

Live Change Repeat was born from the idea that we hope to Live and Learn, to Change and Grow, and move forward living differently because of what we learned. The owner of Live Change Repeat is somewhat … scatter brained … as in … thoughts … well … all over the place! I discovered that working with my hands really helps me coral my thoughts. If I am not working with my hands - I’m not writing either. (I’m actually starting to accept this as … me). It was sort of an epiphany when I started to “Repurpose” furniture. I realized that I liked doing it because the piece I am working on is going to get a second chance to be useful. (Who wouldn’t want THAT)! A table that has “lived” can “Change” and then (live again) “repeat”.
The DIY section of this site will show my projects to hopefully inspire others and share ideas and such. Feel free to email me if you have questions. LiveChangeRepeat@gmail.com
“The Creation of a Make Up Armoire”
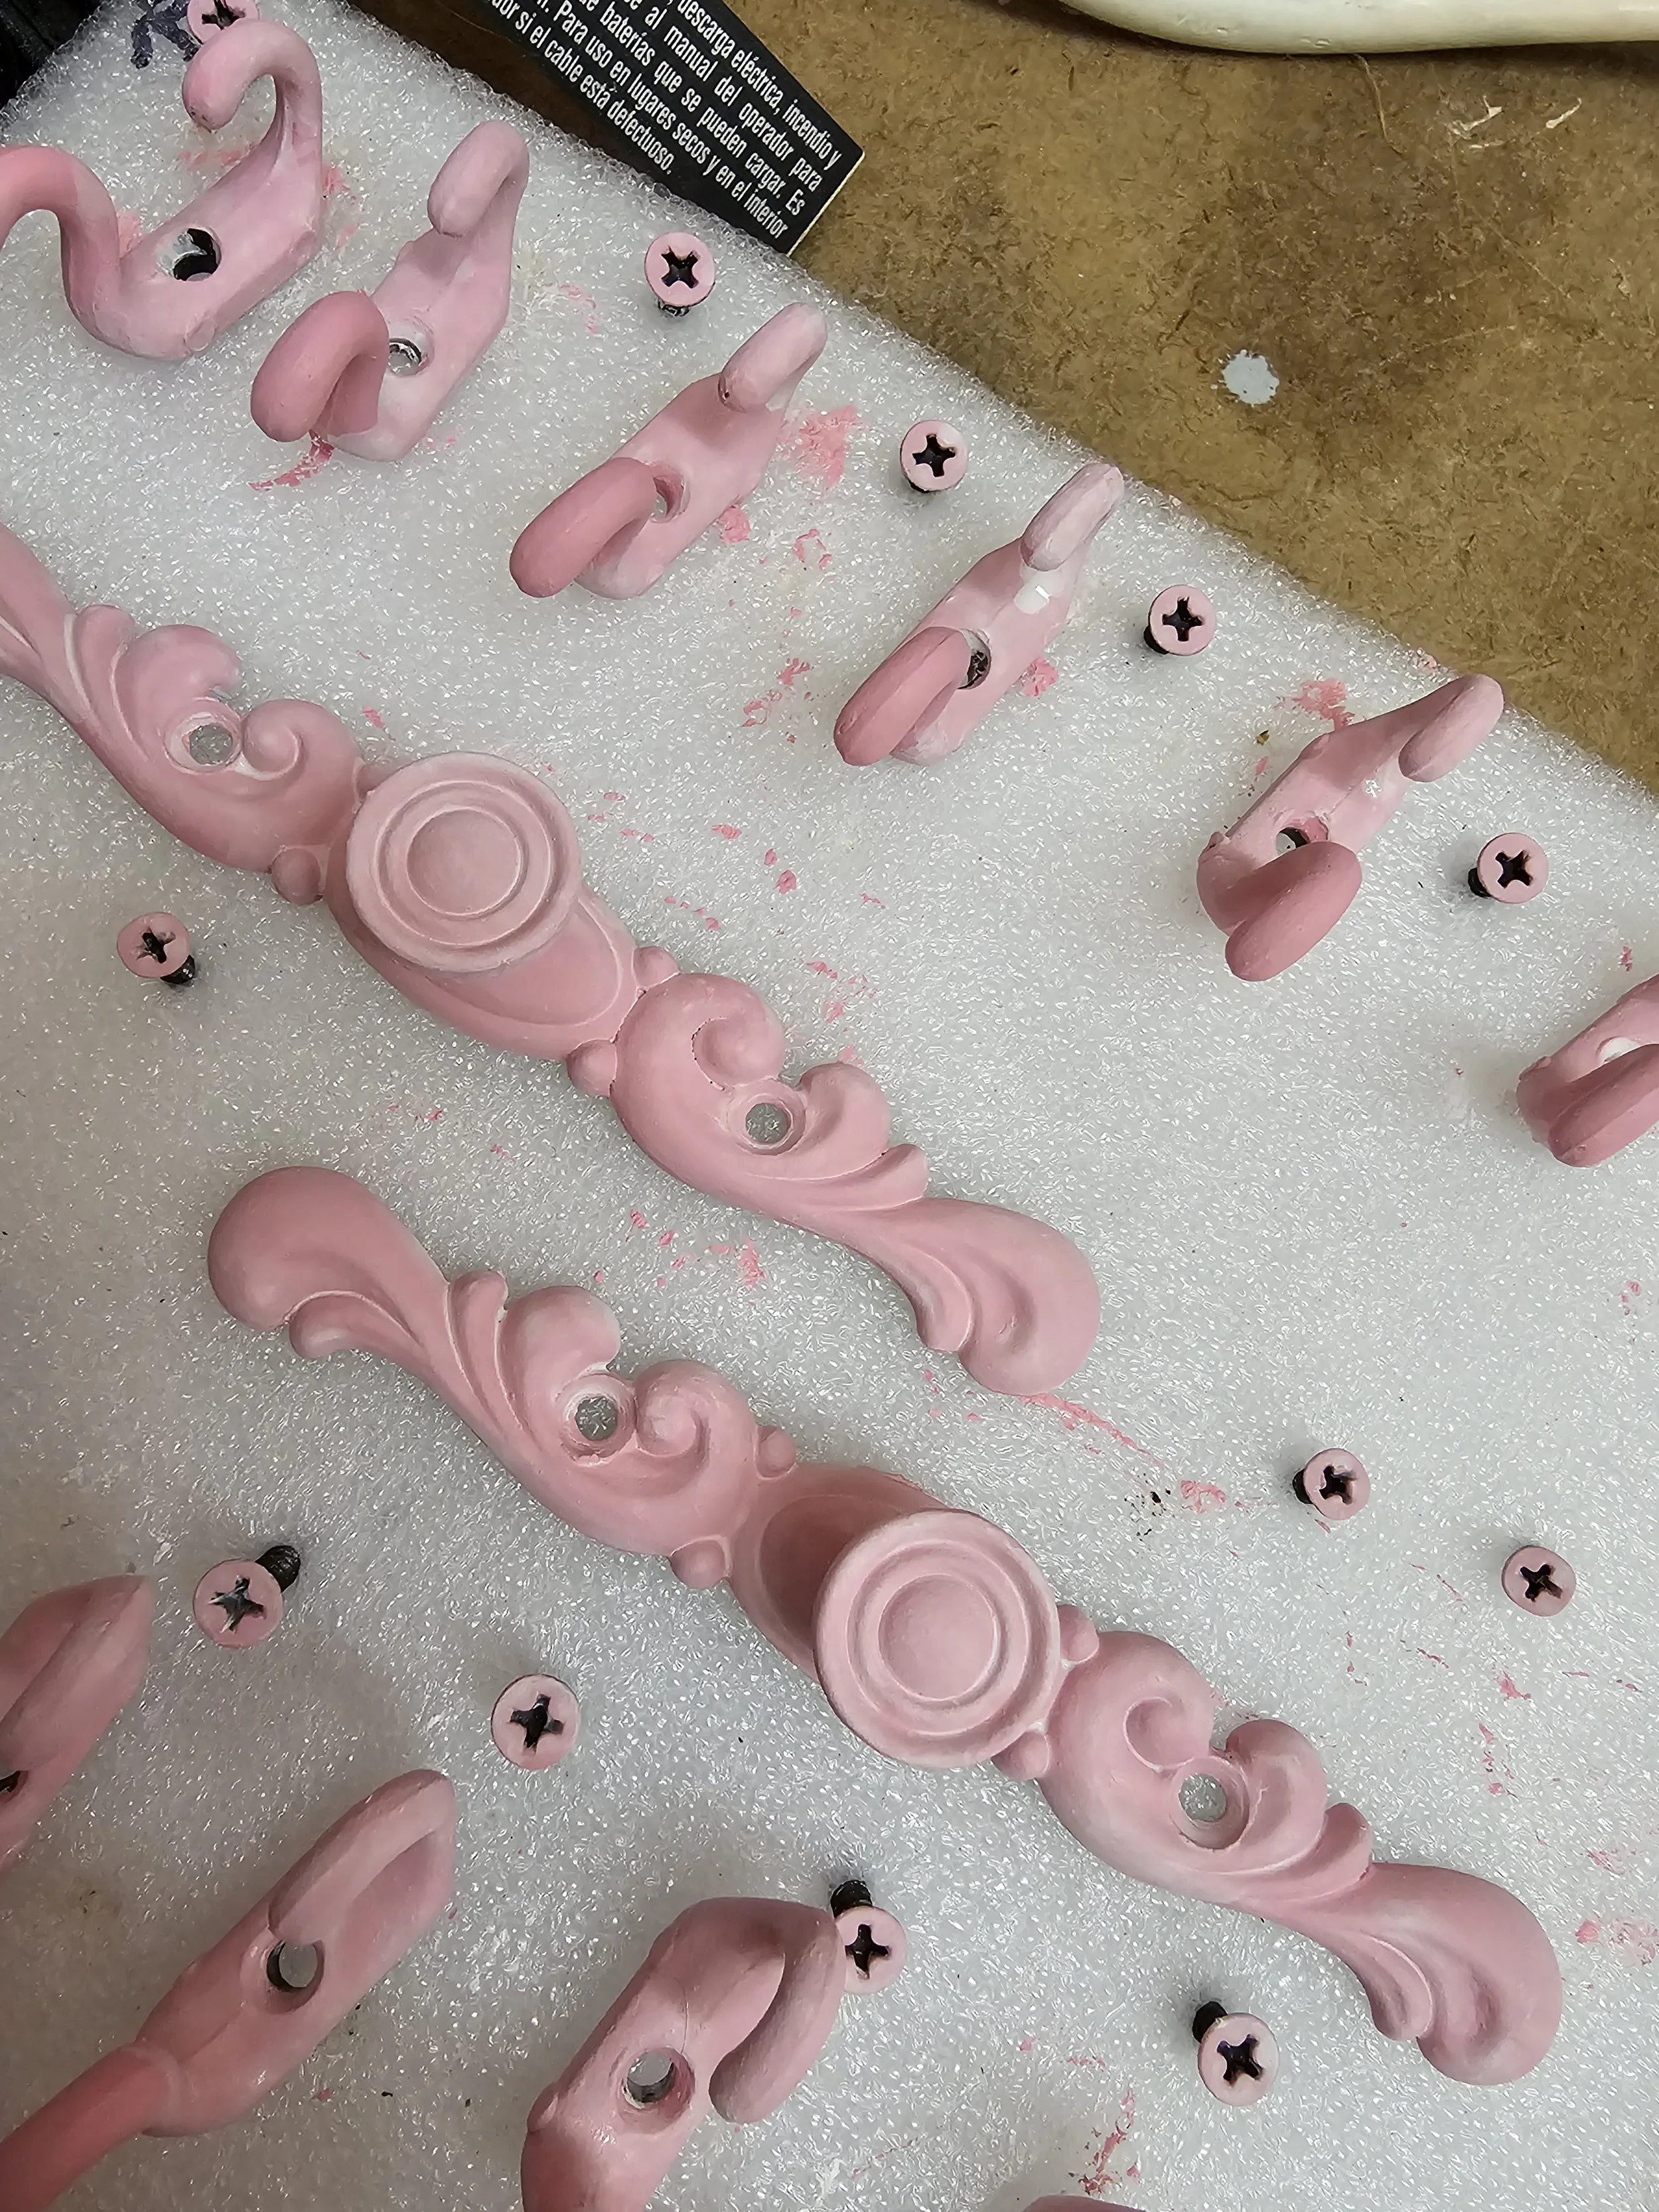
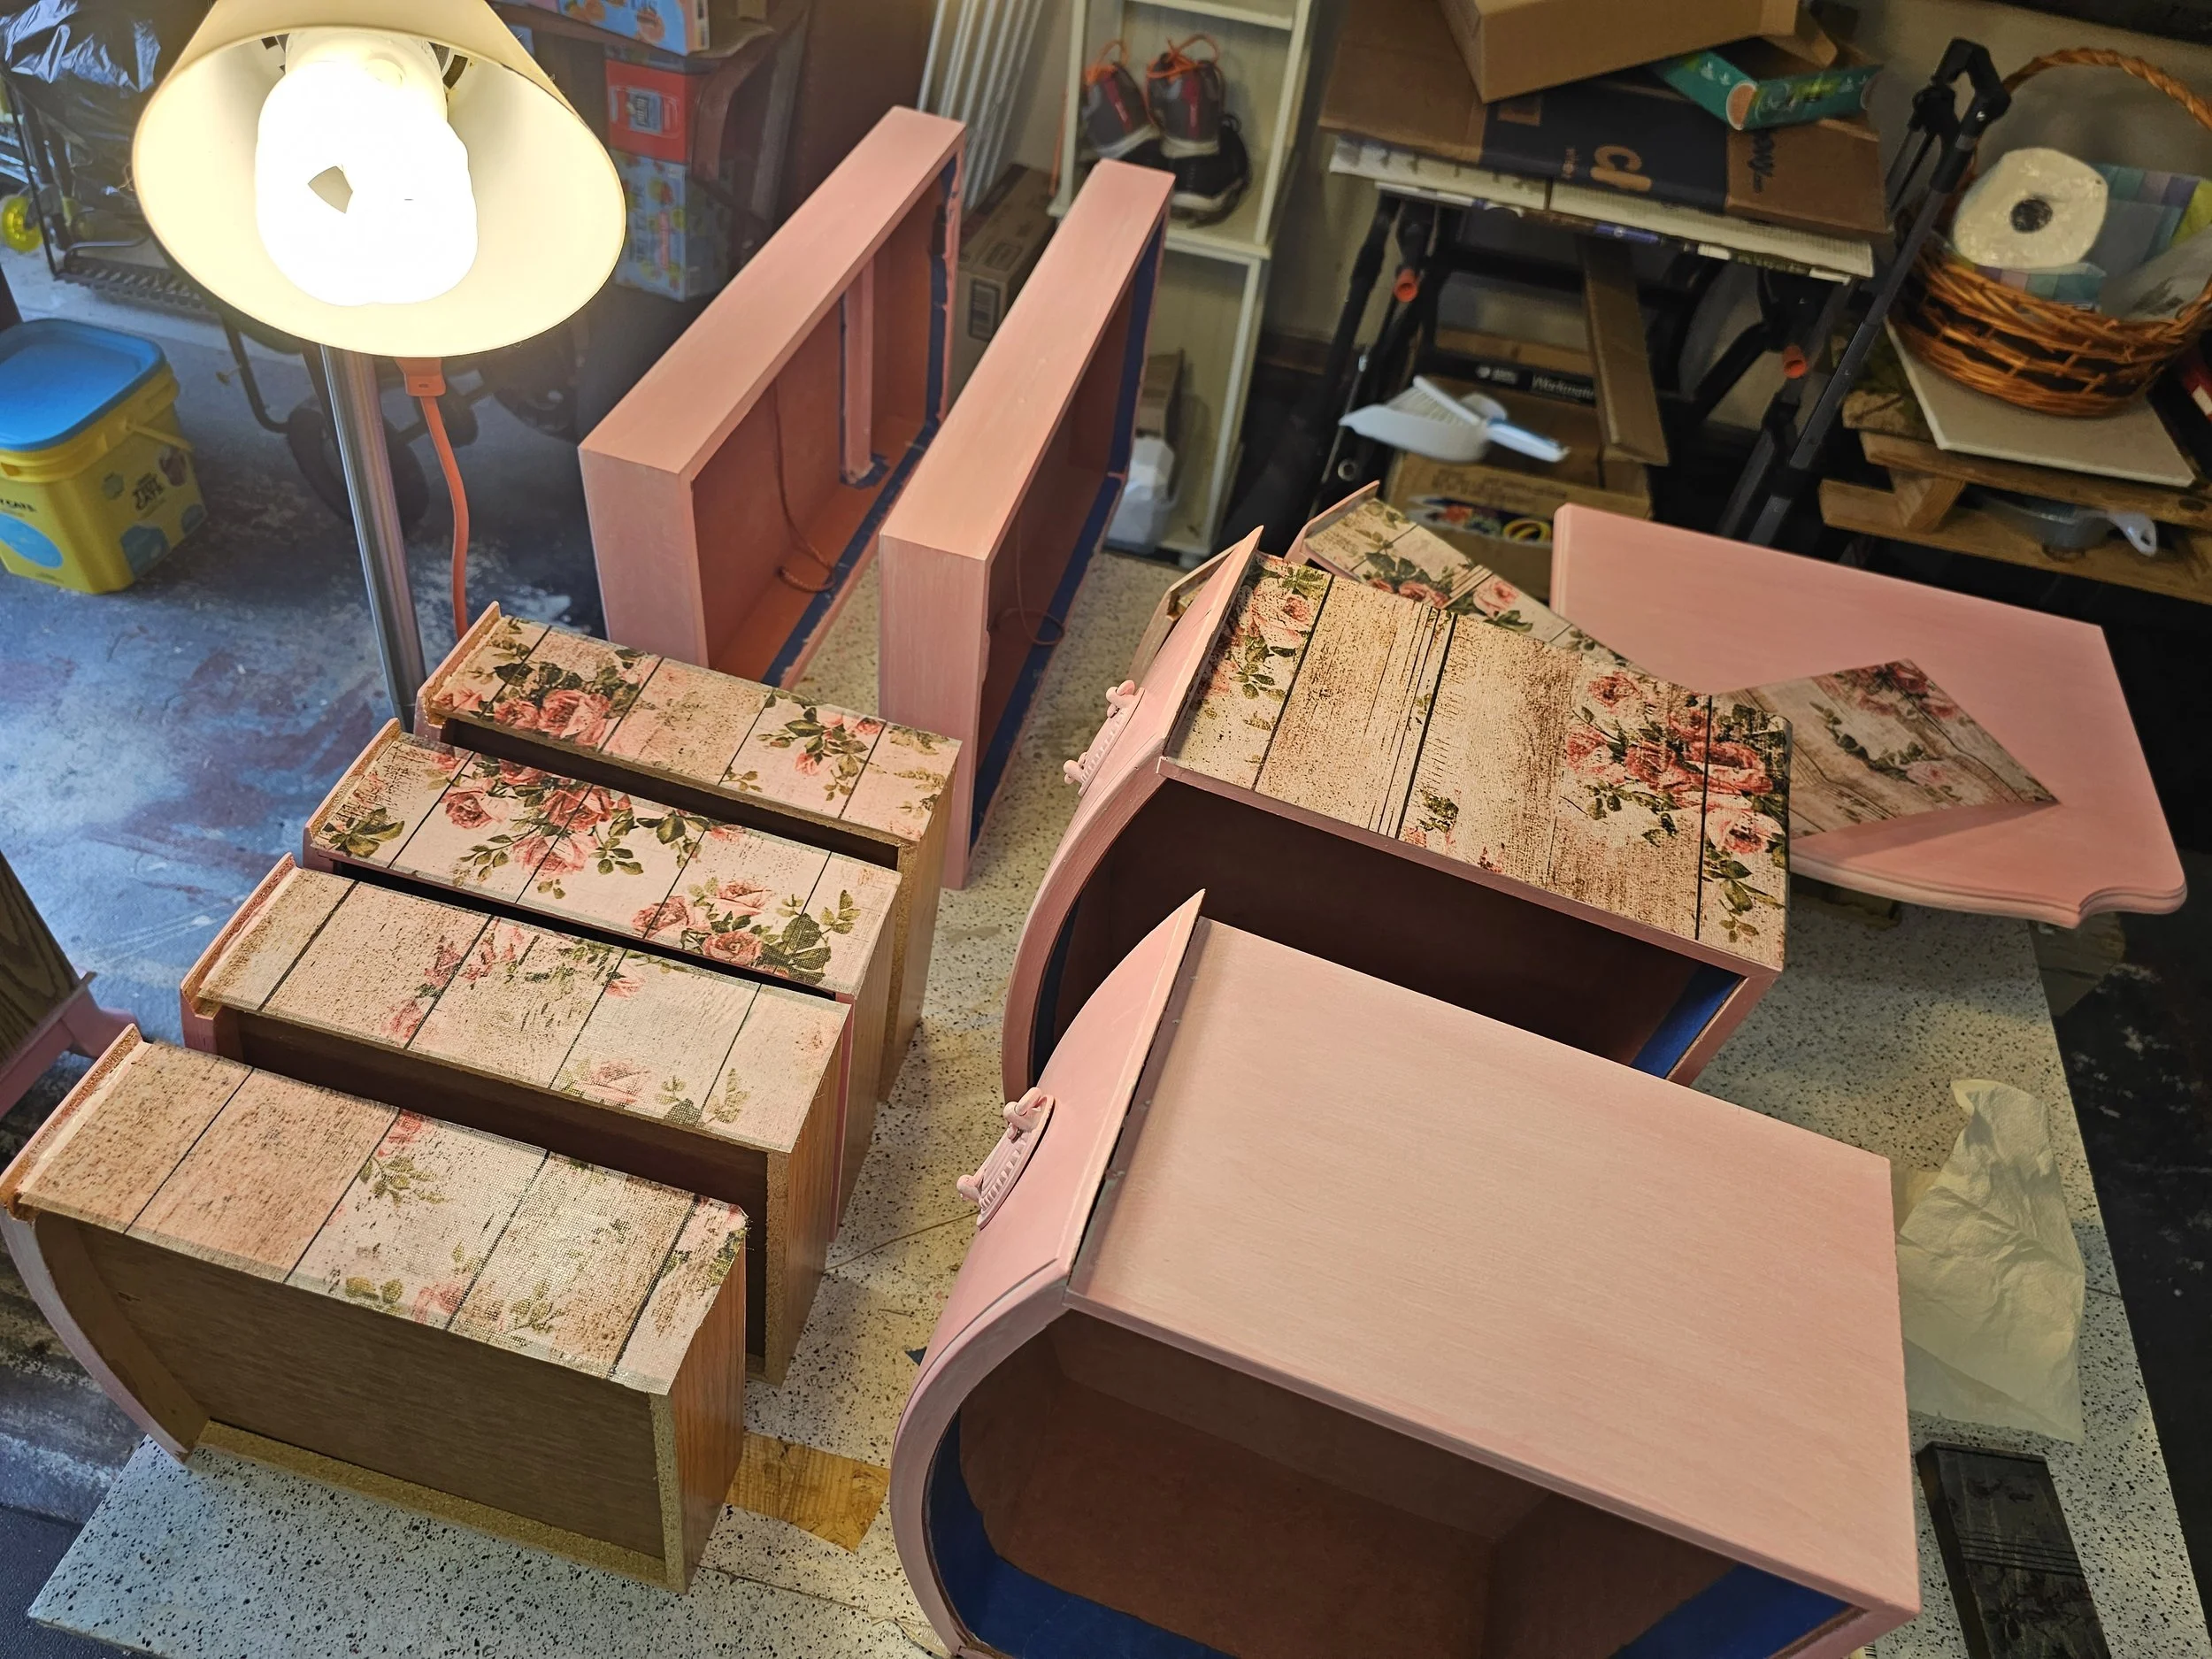
I had the idea that besides having my jewelry all in one neat narrow place I would also like if my make up, hair and nail products could occupy a similar space. I picked up a large jewelry armoire that someone primed and gave up on. I decided I was making this for me and I was pulling out all the stops! With a blank canvas I began to sketch out how I would adorn it with vines and flowers dripping everywhere. I gutted the drawers and doors so I could line them with something worthy of the mess that make up can cause. With a bottle of Magic Resin and some silicone molds I set out to create…and I went crazy!!
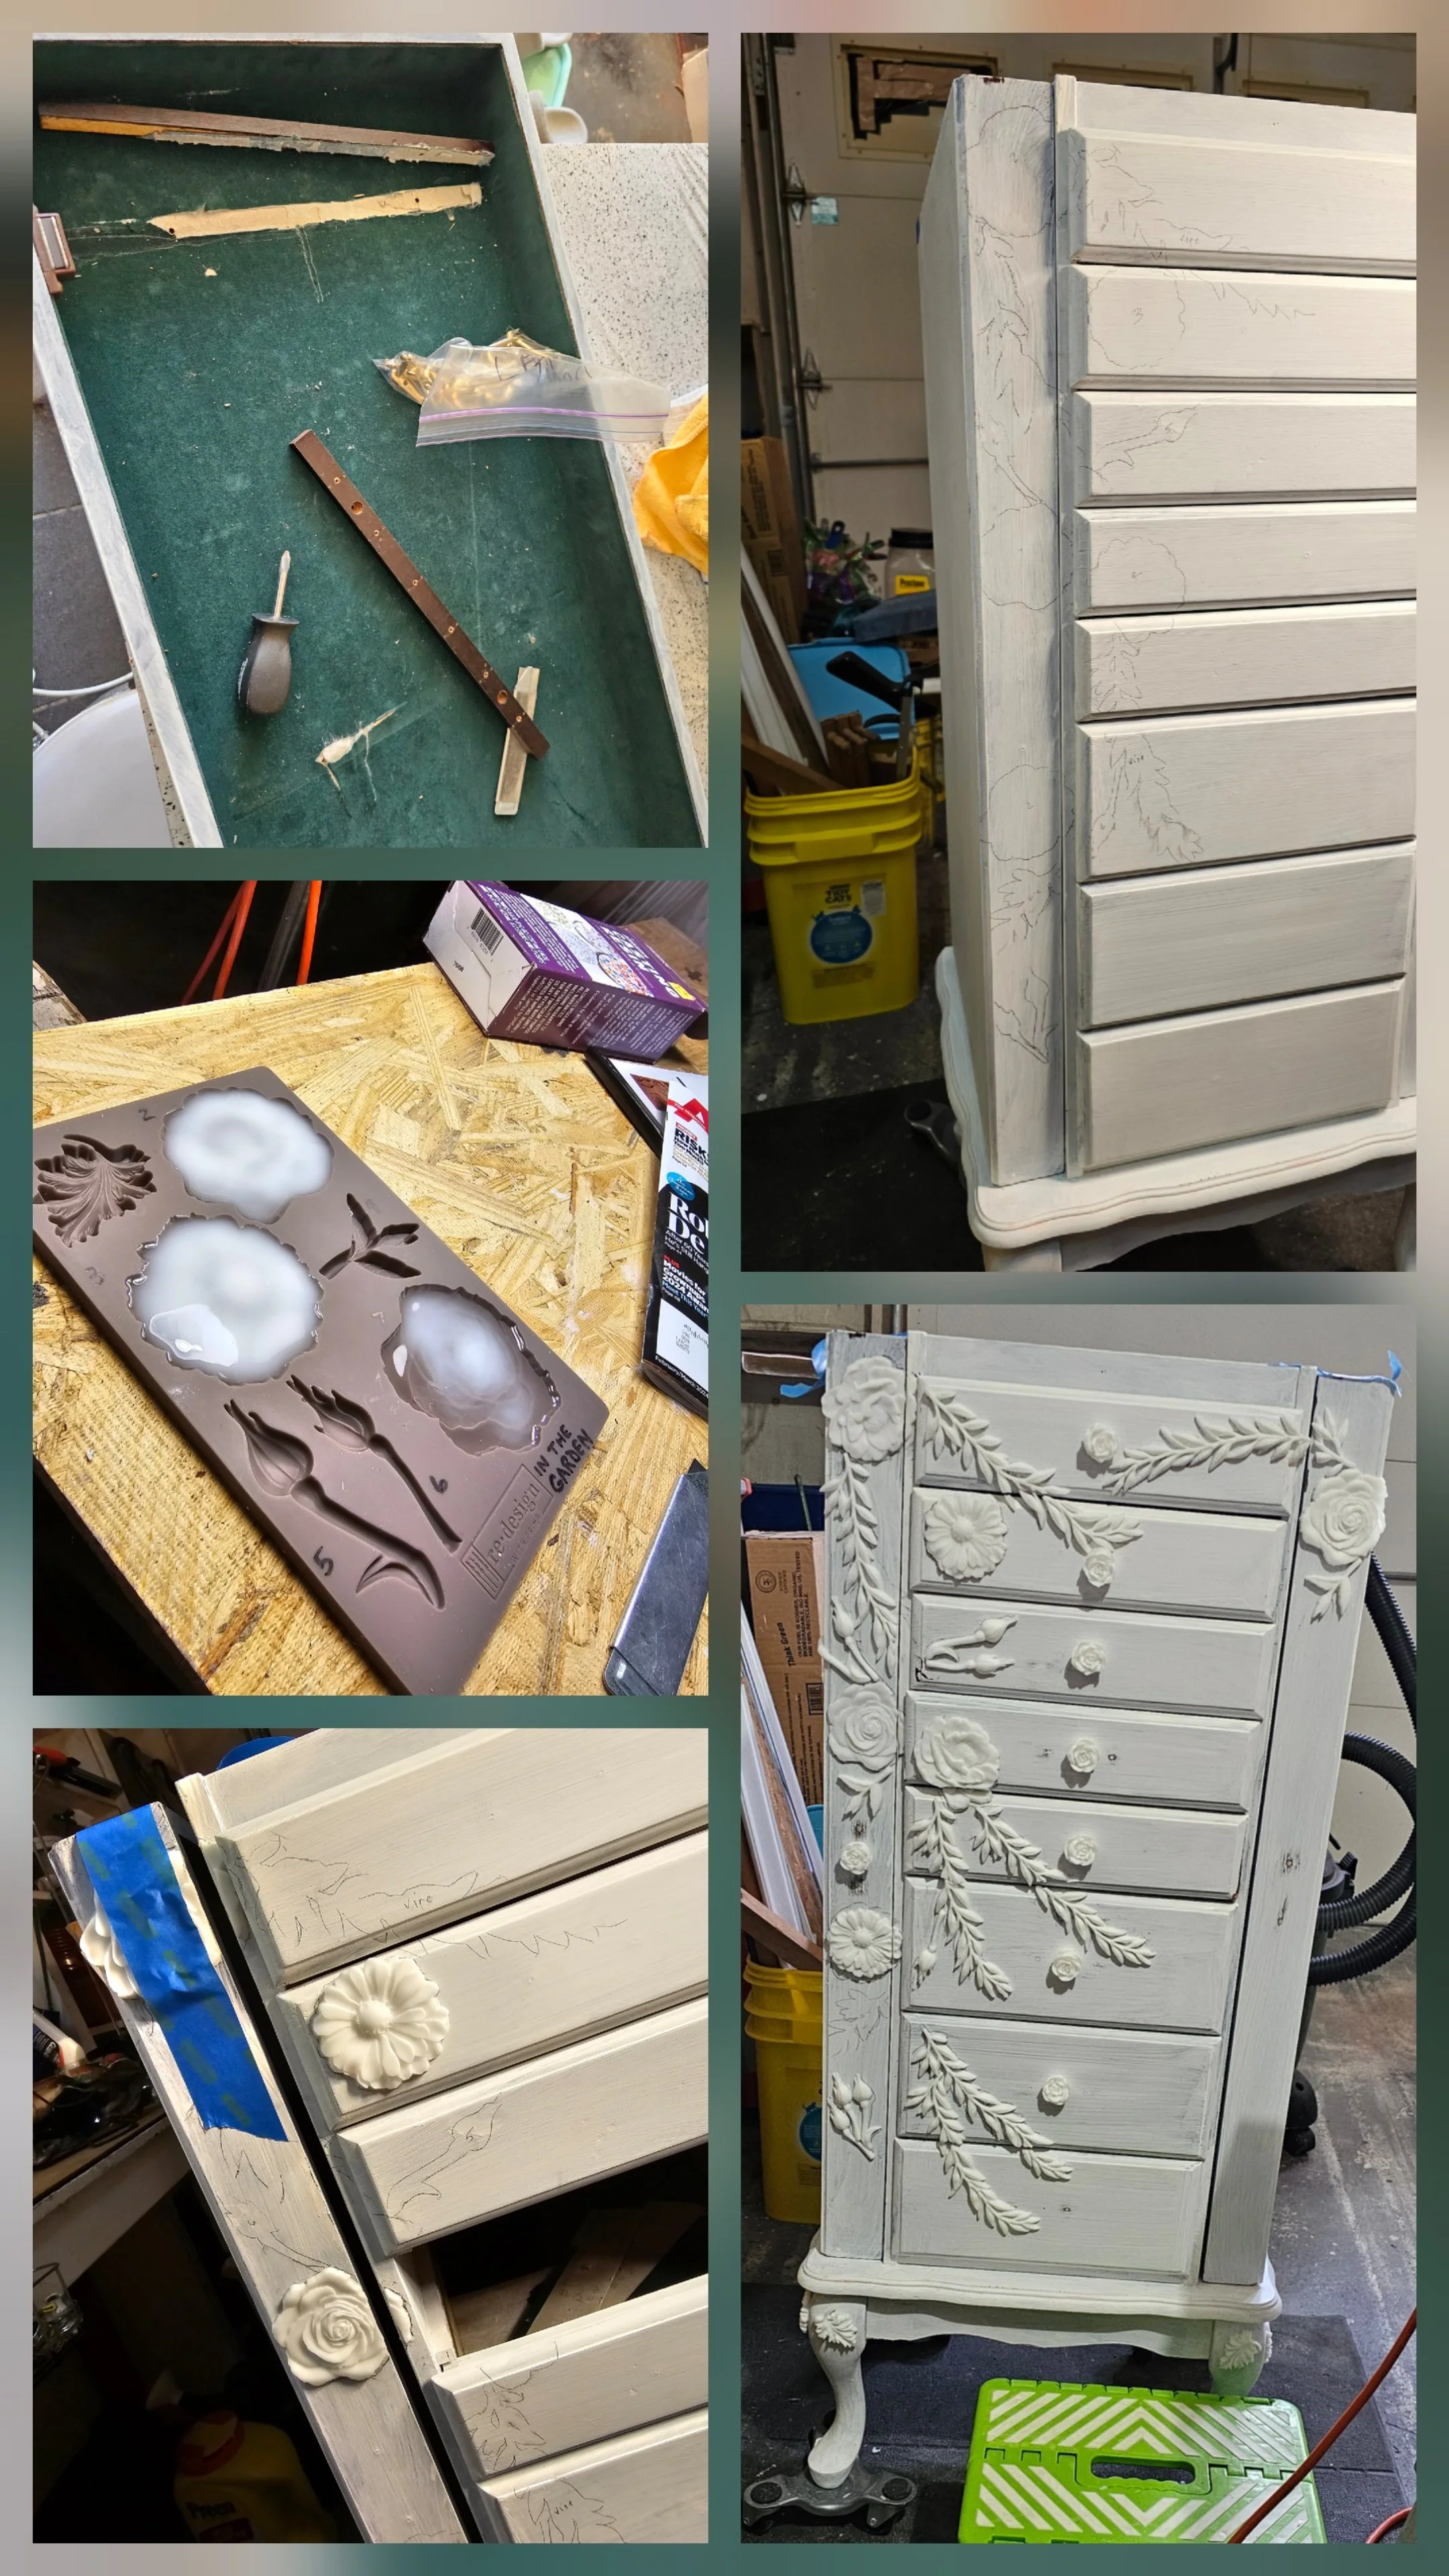
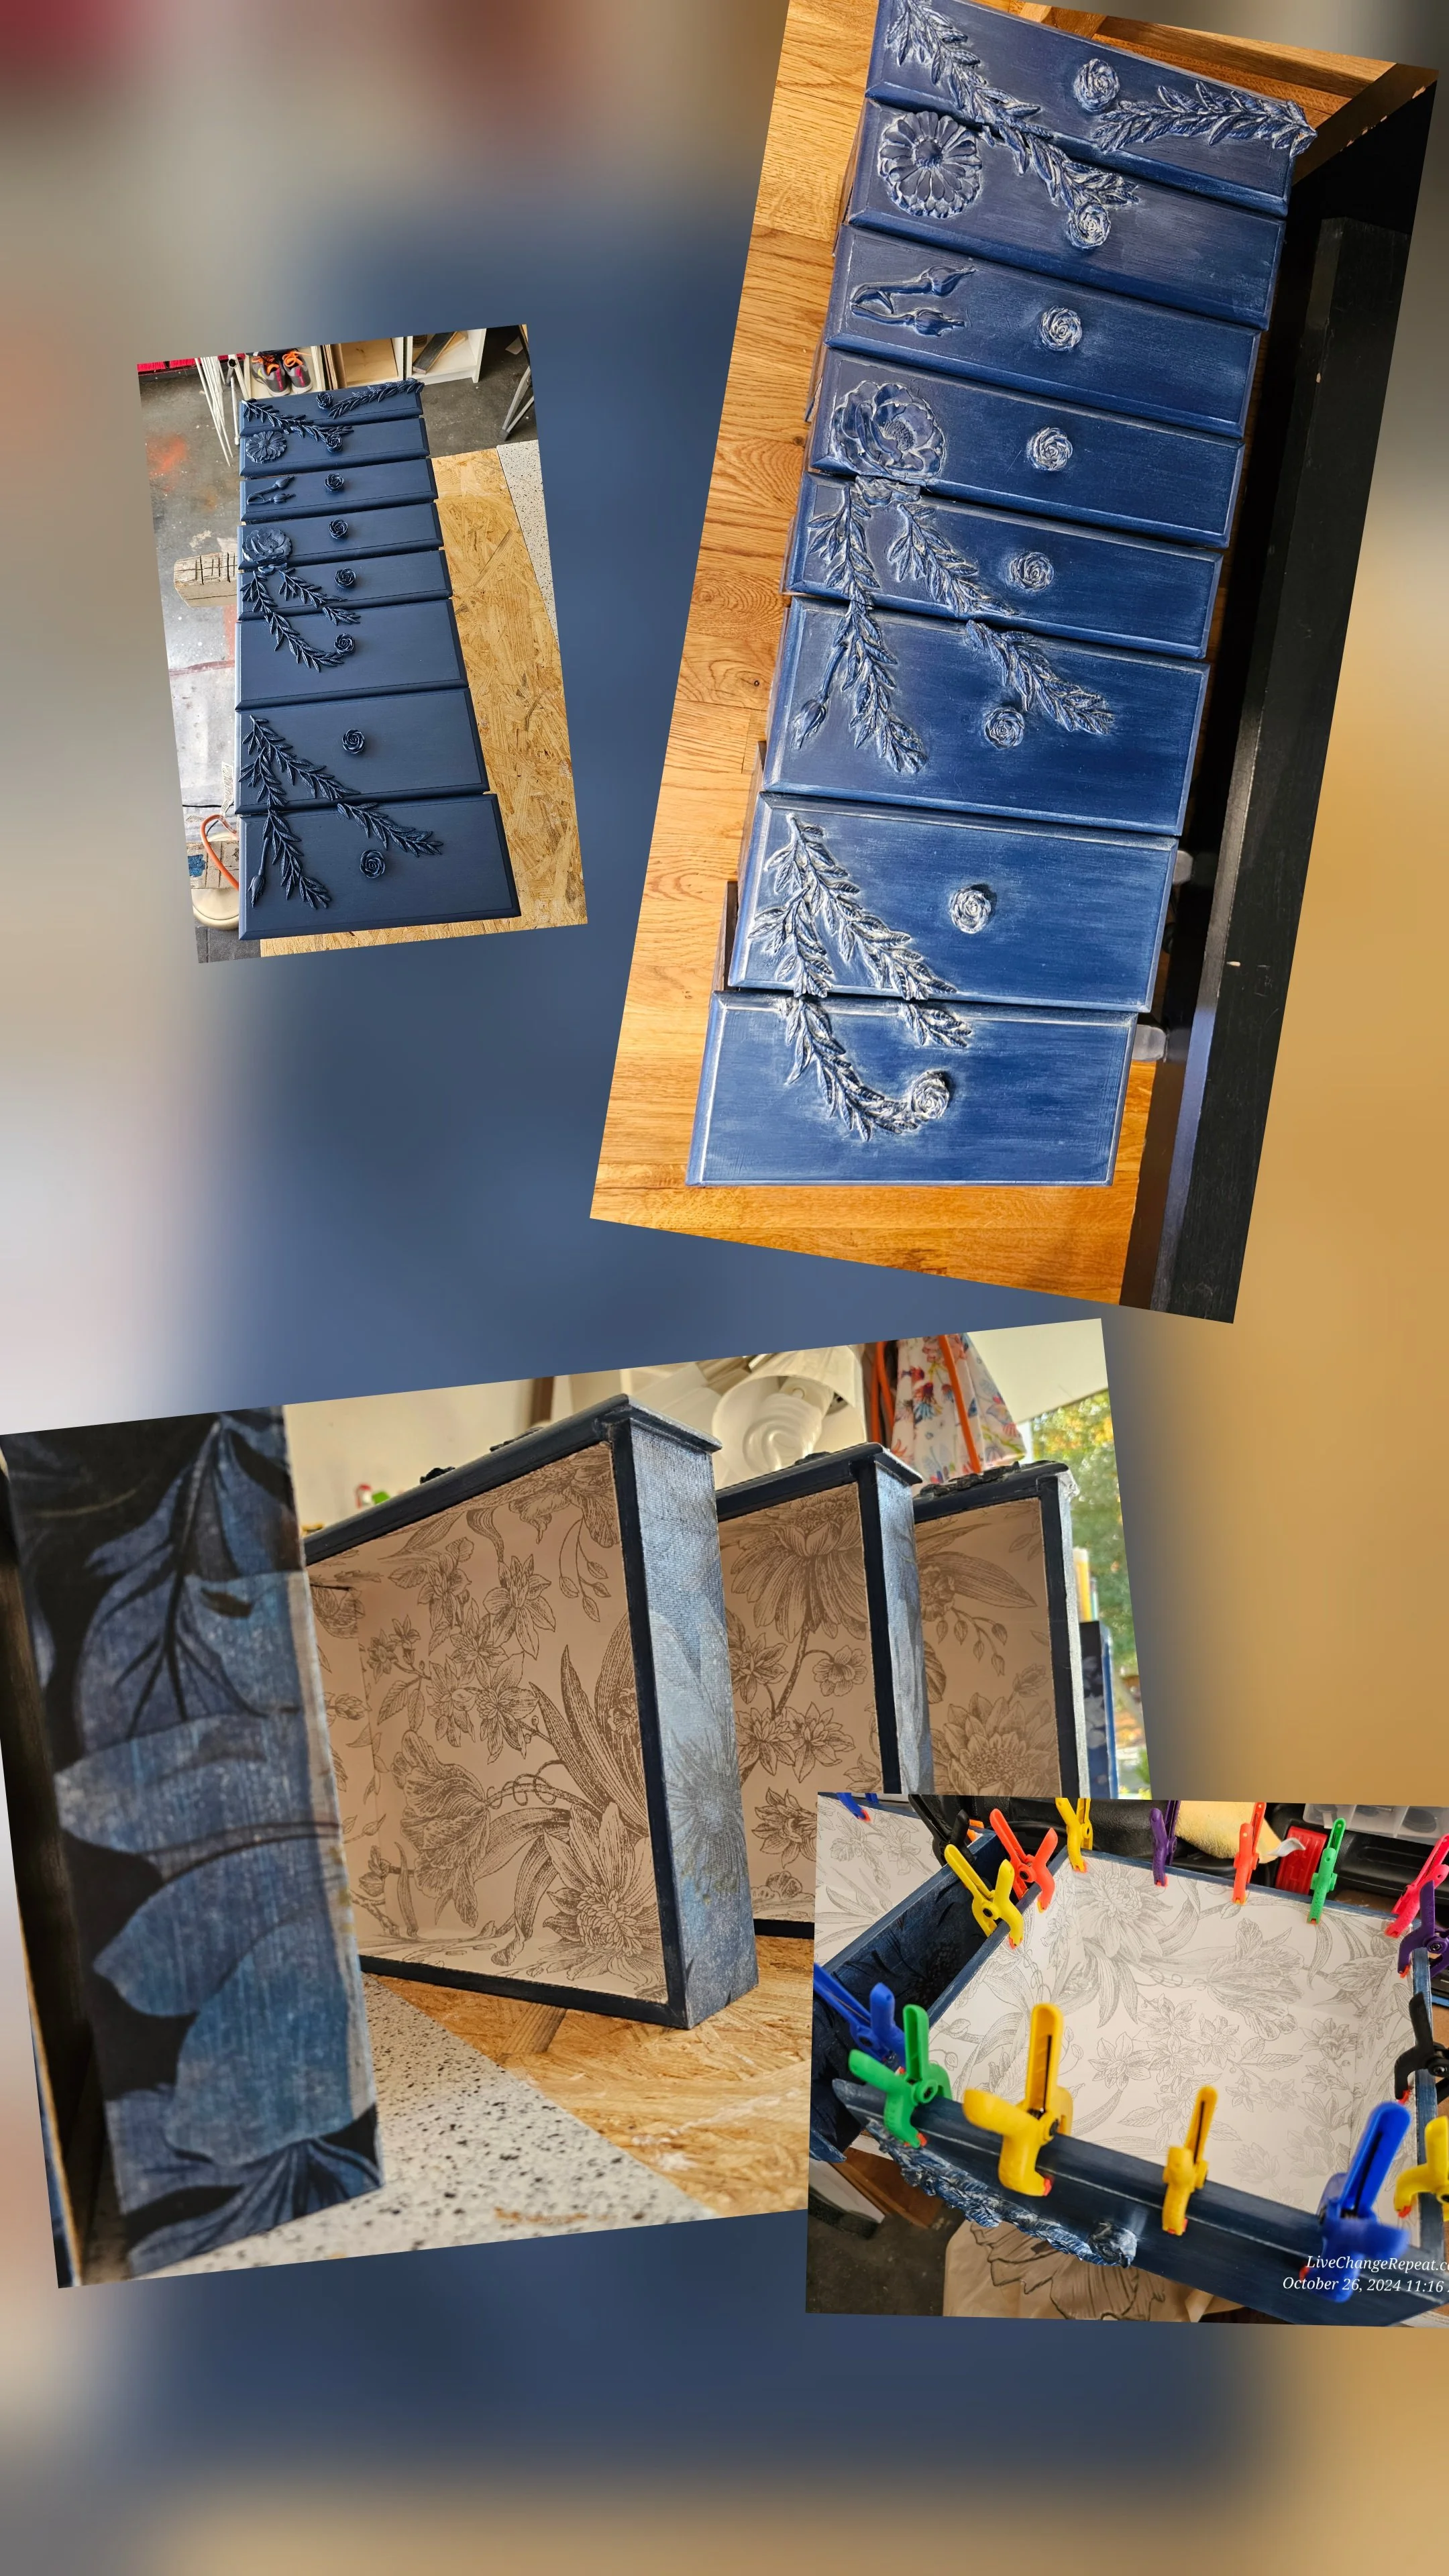
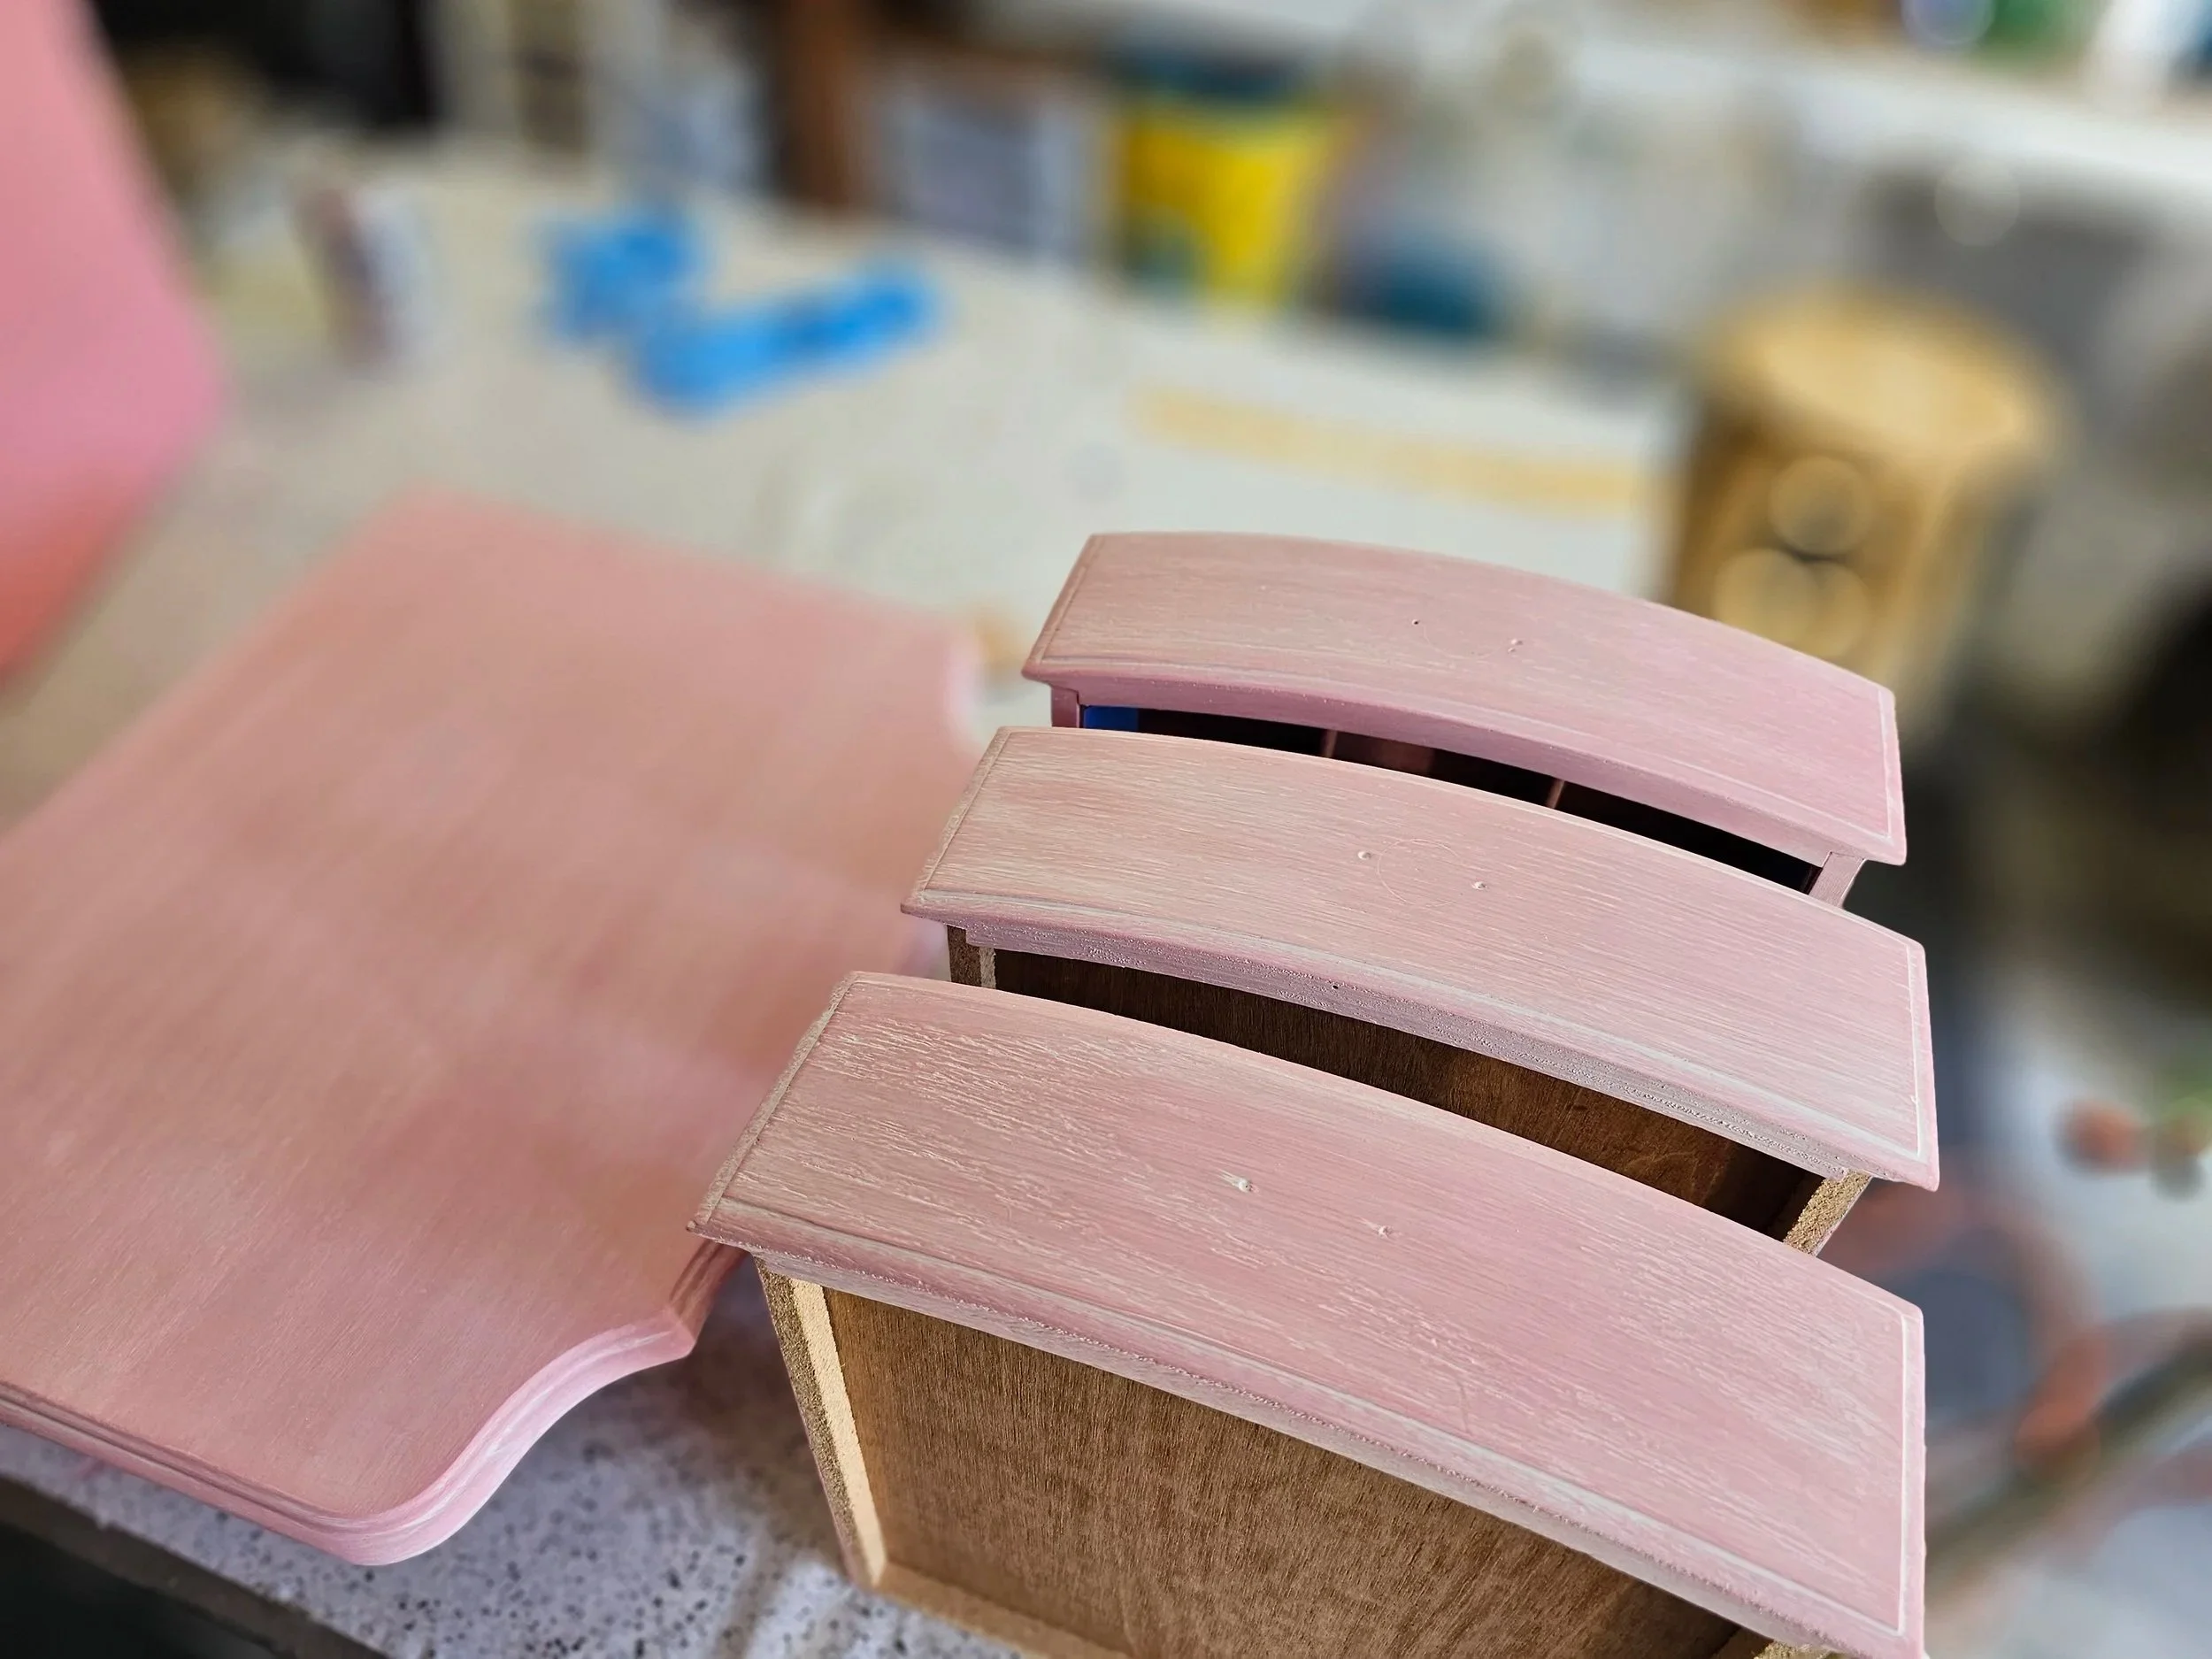
My favorite Blue! - Add some white wash - line the drawers with some pretty paper and the sides of the drawers with a sweet decoupage’ for a little extra joy!
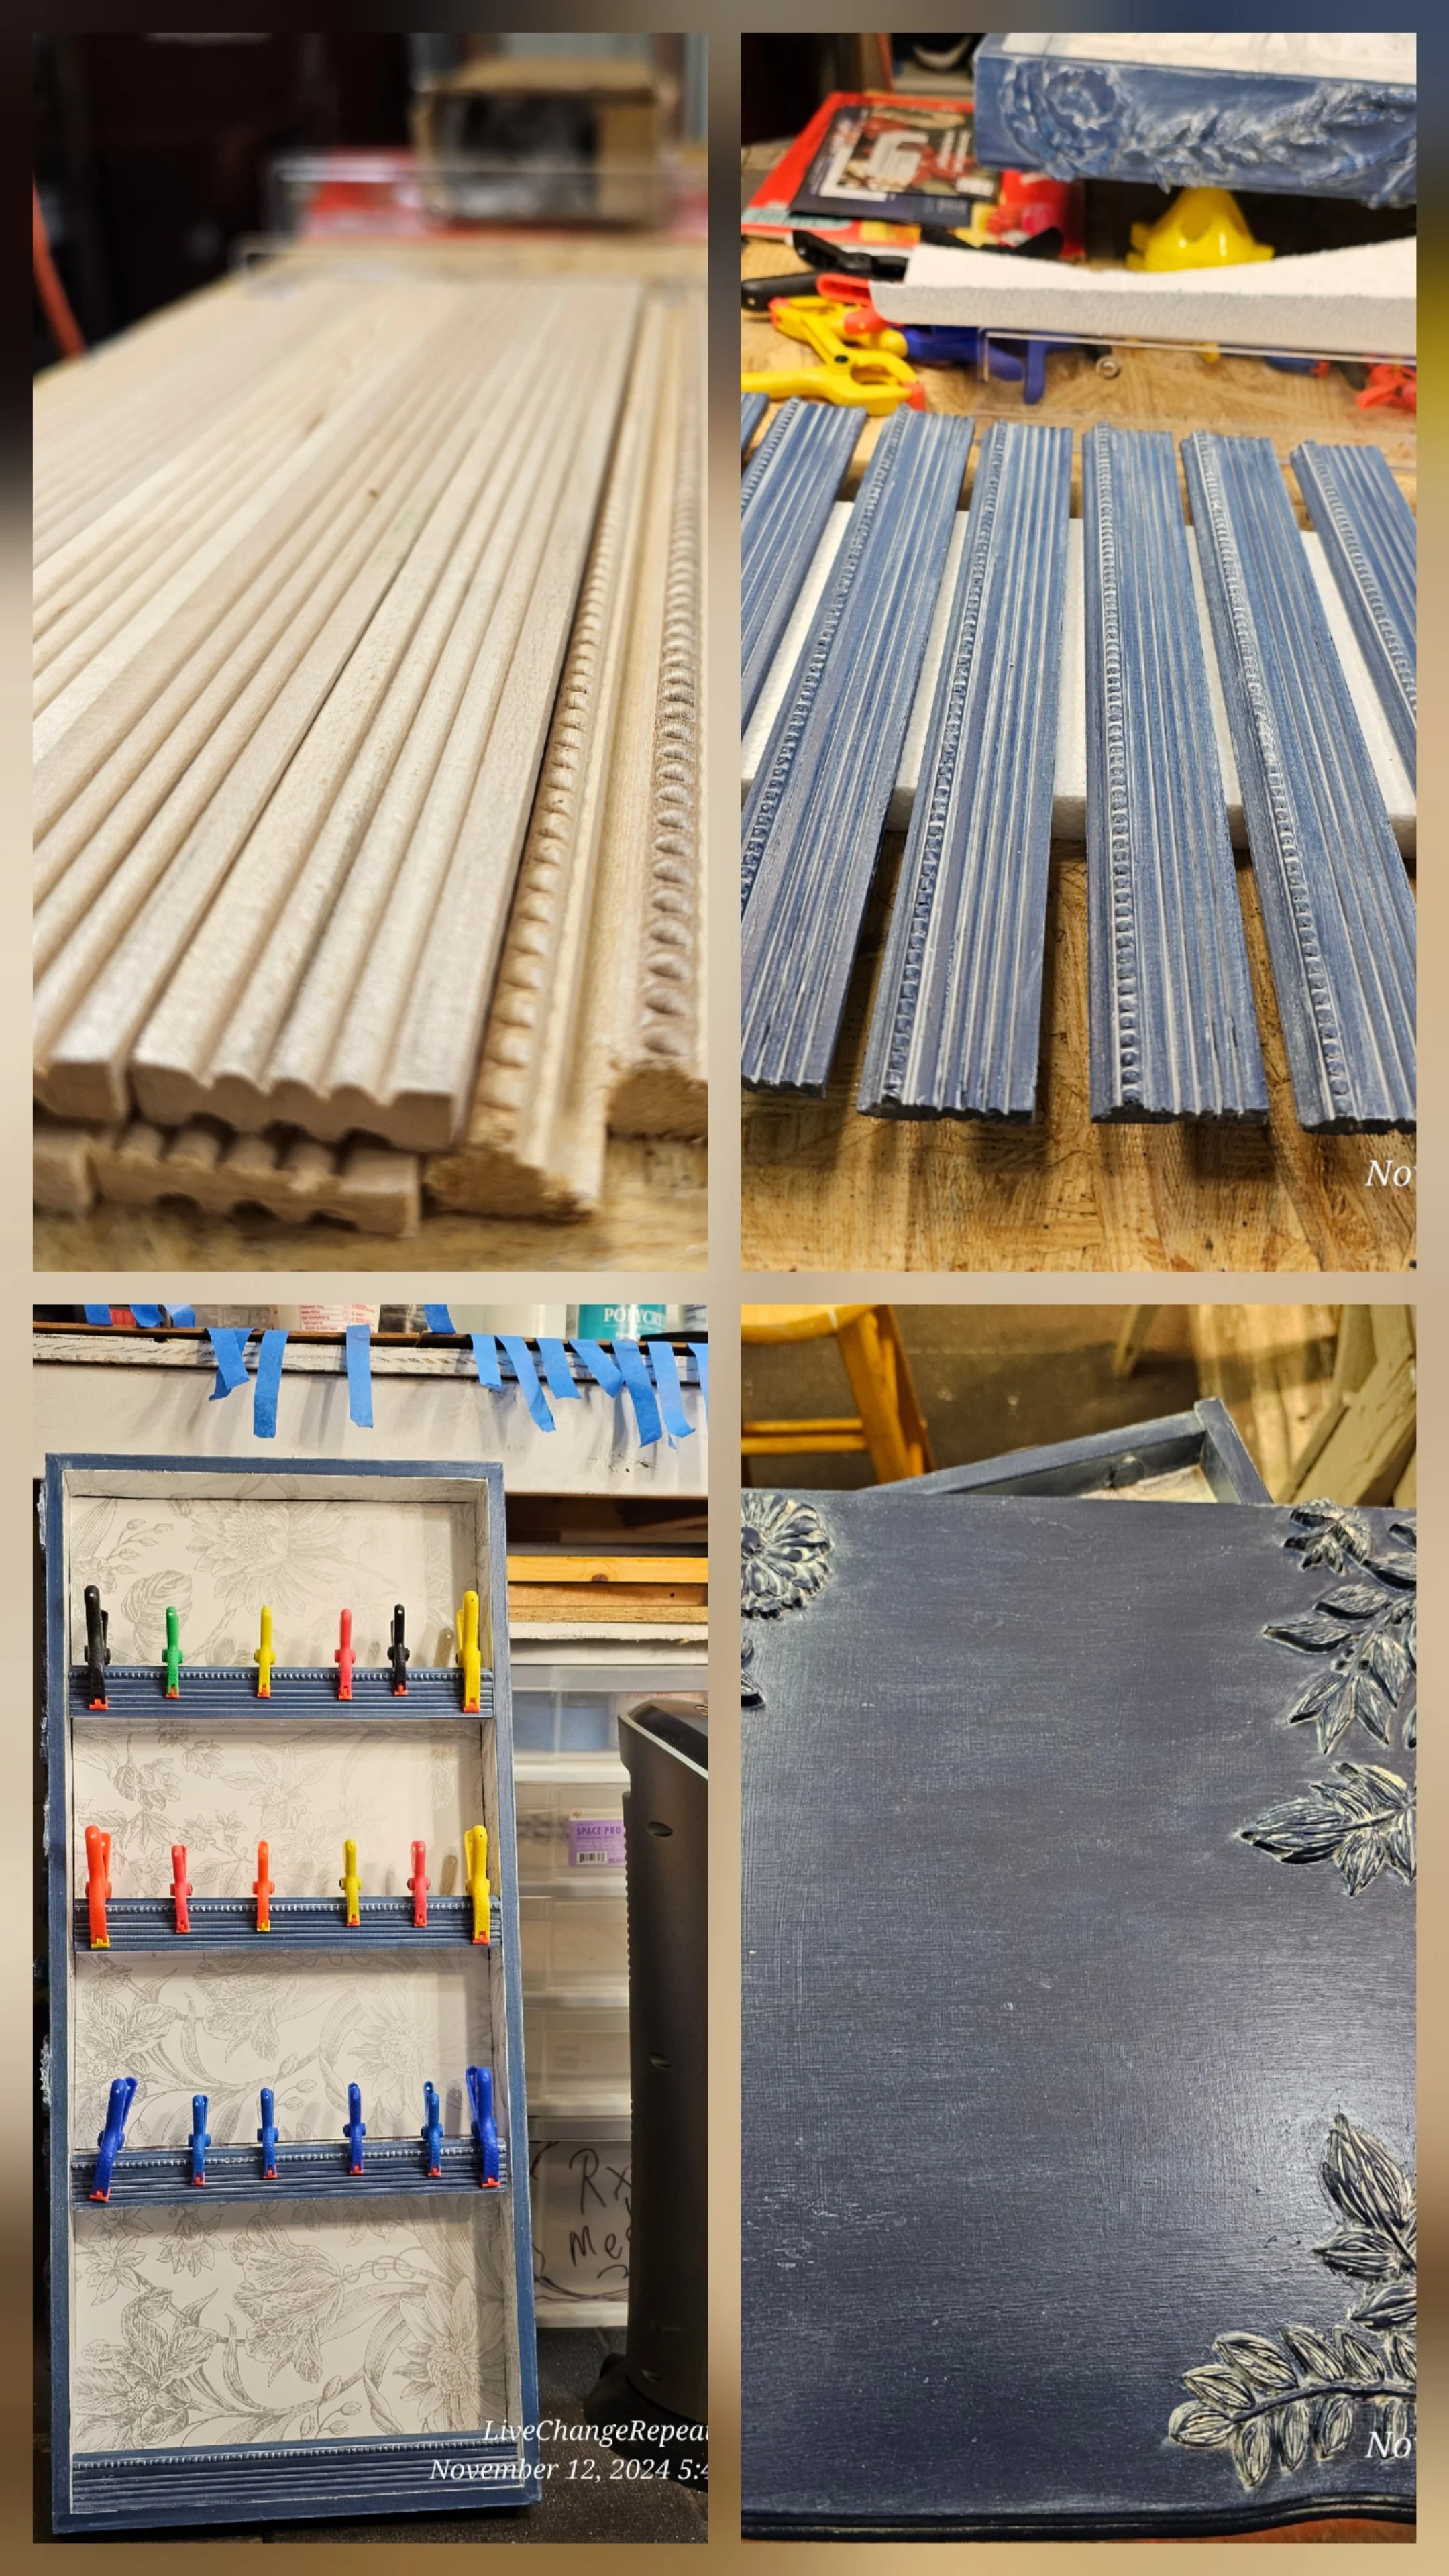
Then off to Home Depot for some wood molding pieces to cut, sand, paint and white wash to create shelves in the doors. Soooo much Fun!!!
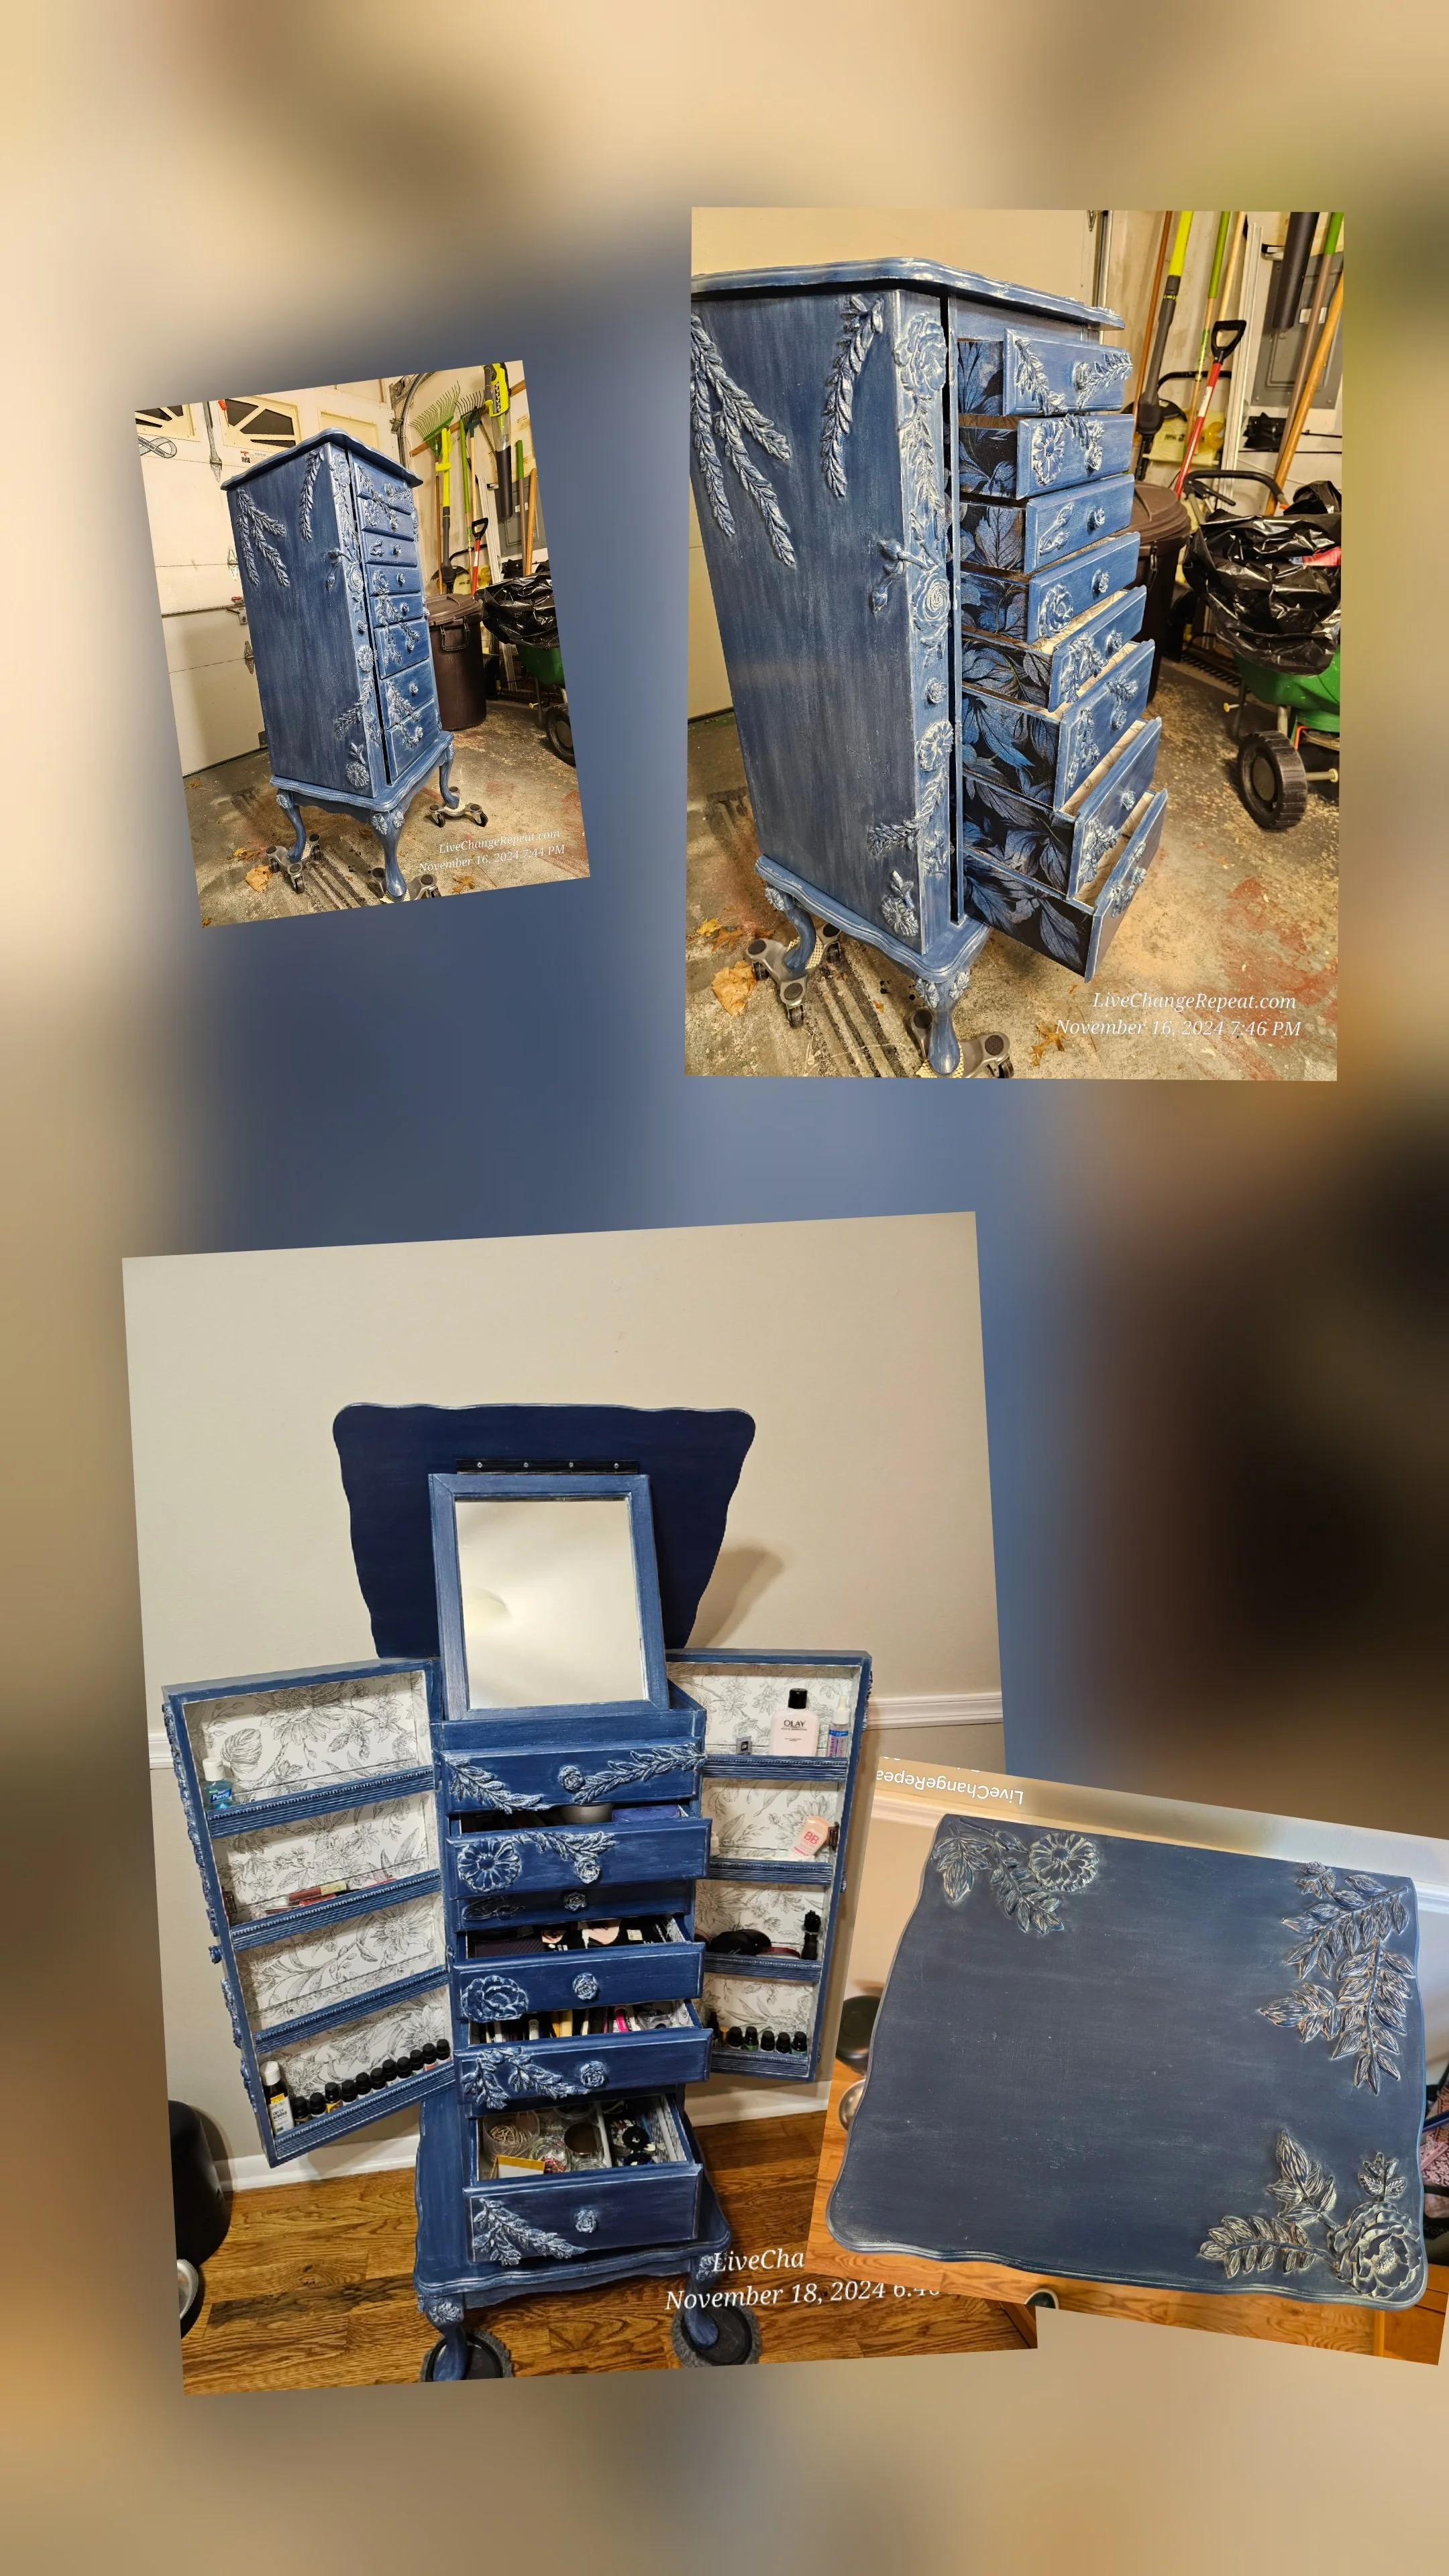
The finished product turned out to be exactly as I envisioned! I learned so much on this and can’t wait to make another one! What will my next theme be?
Say Hello to: “Liza”
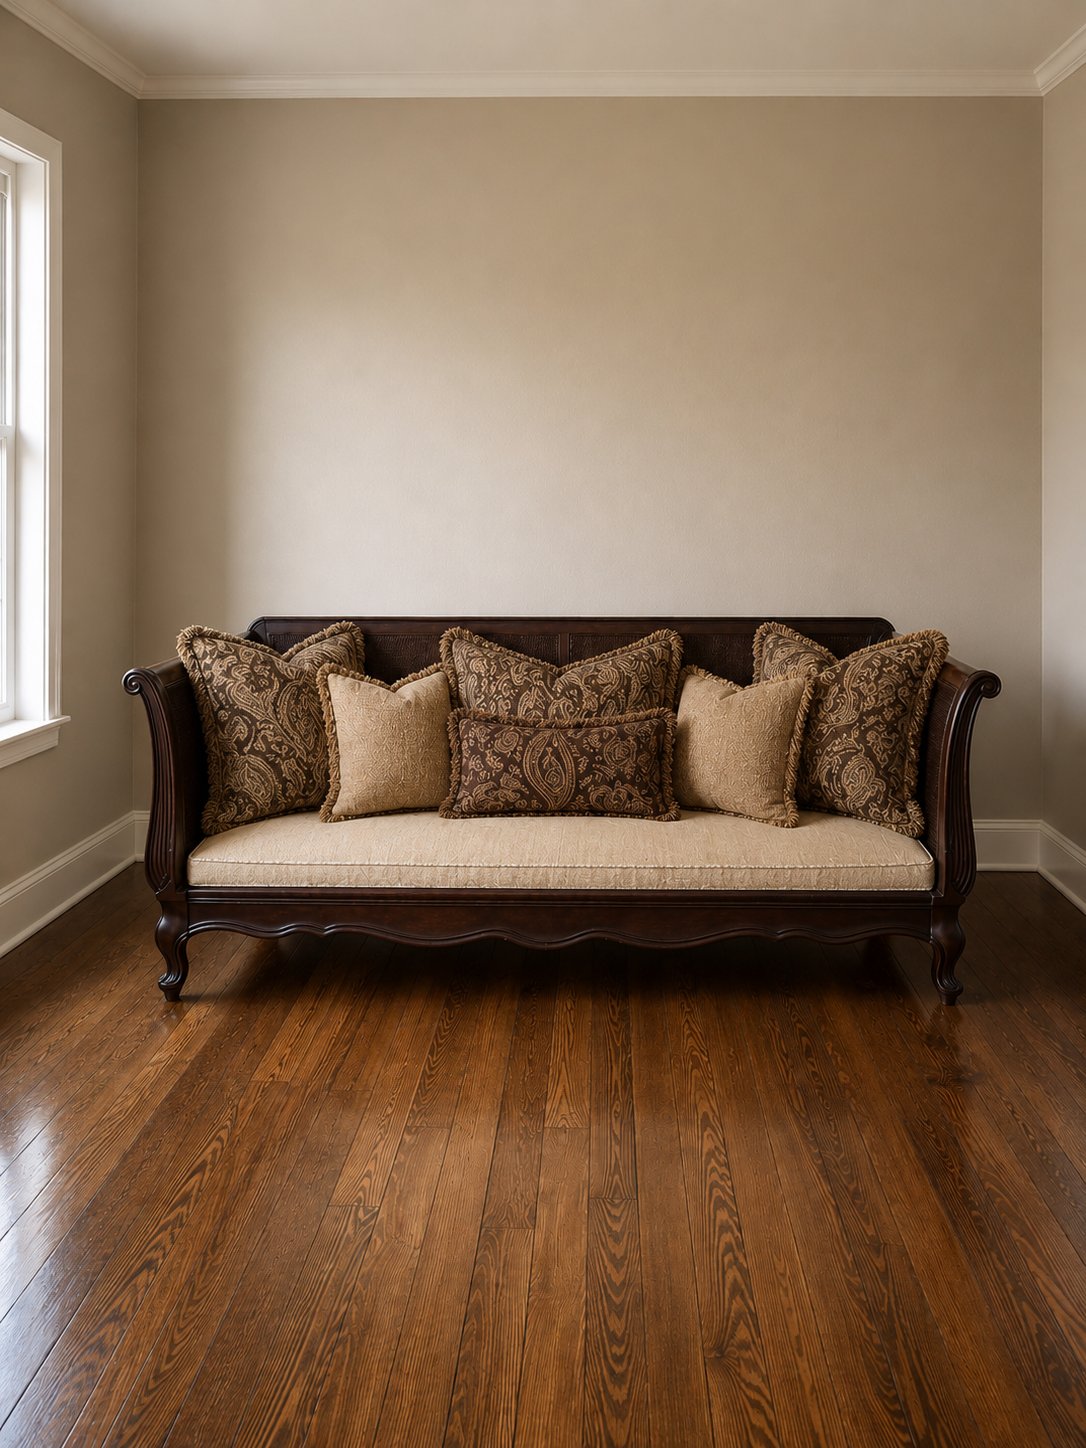
Staging room is AI courtesy of ChatGBT, as well as the cushions on the before picture.
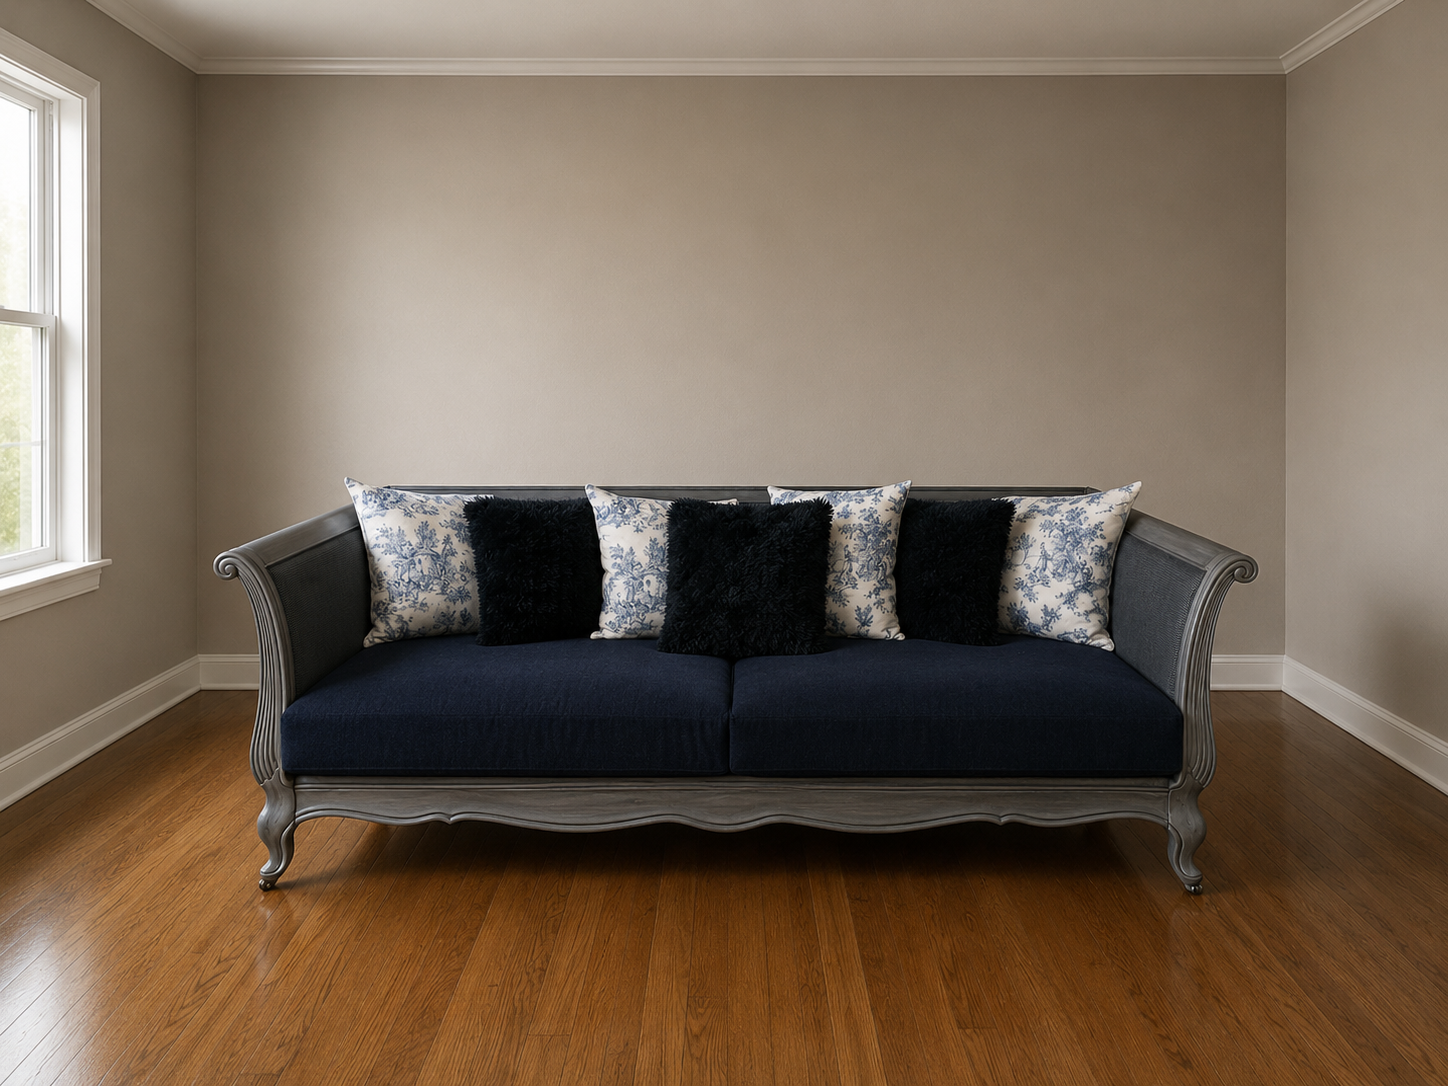
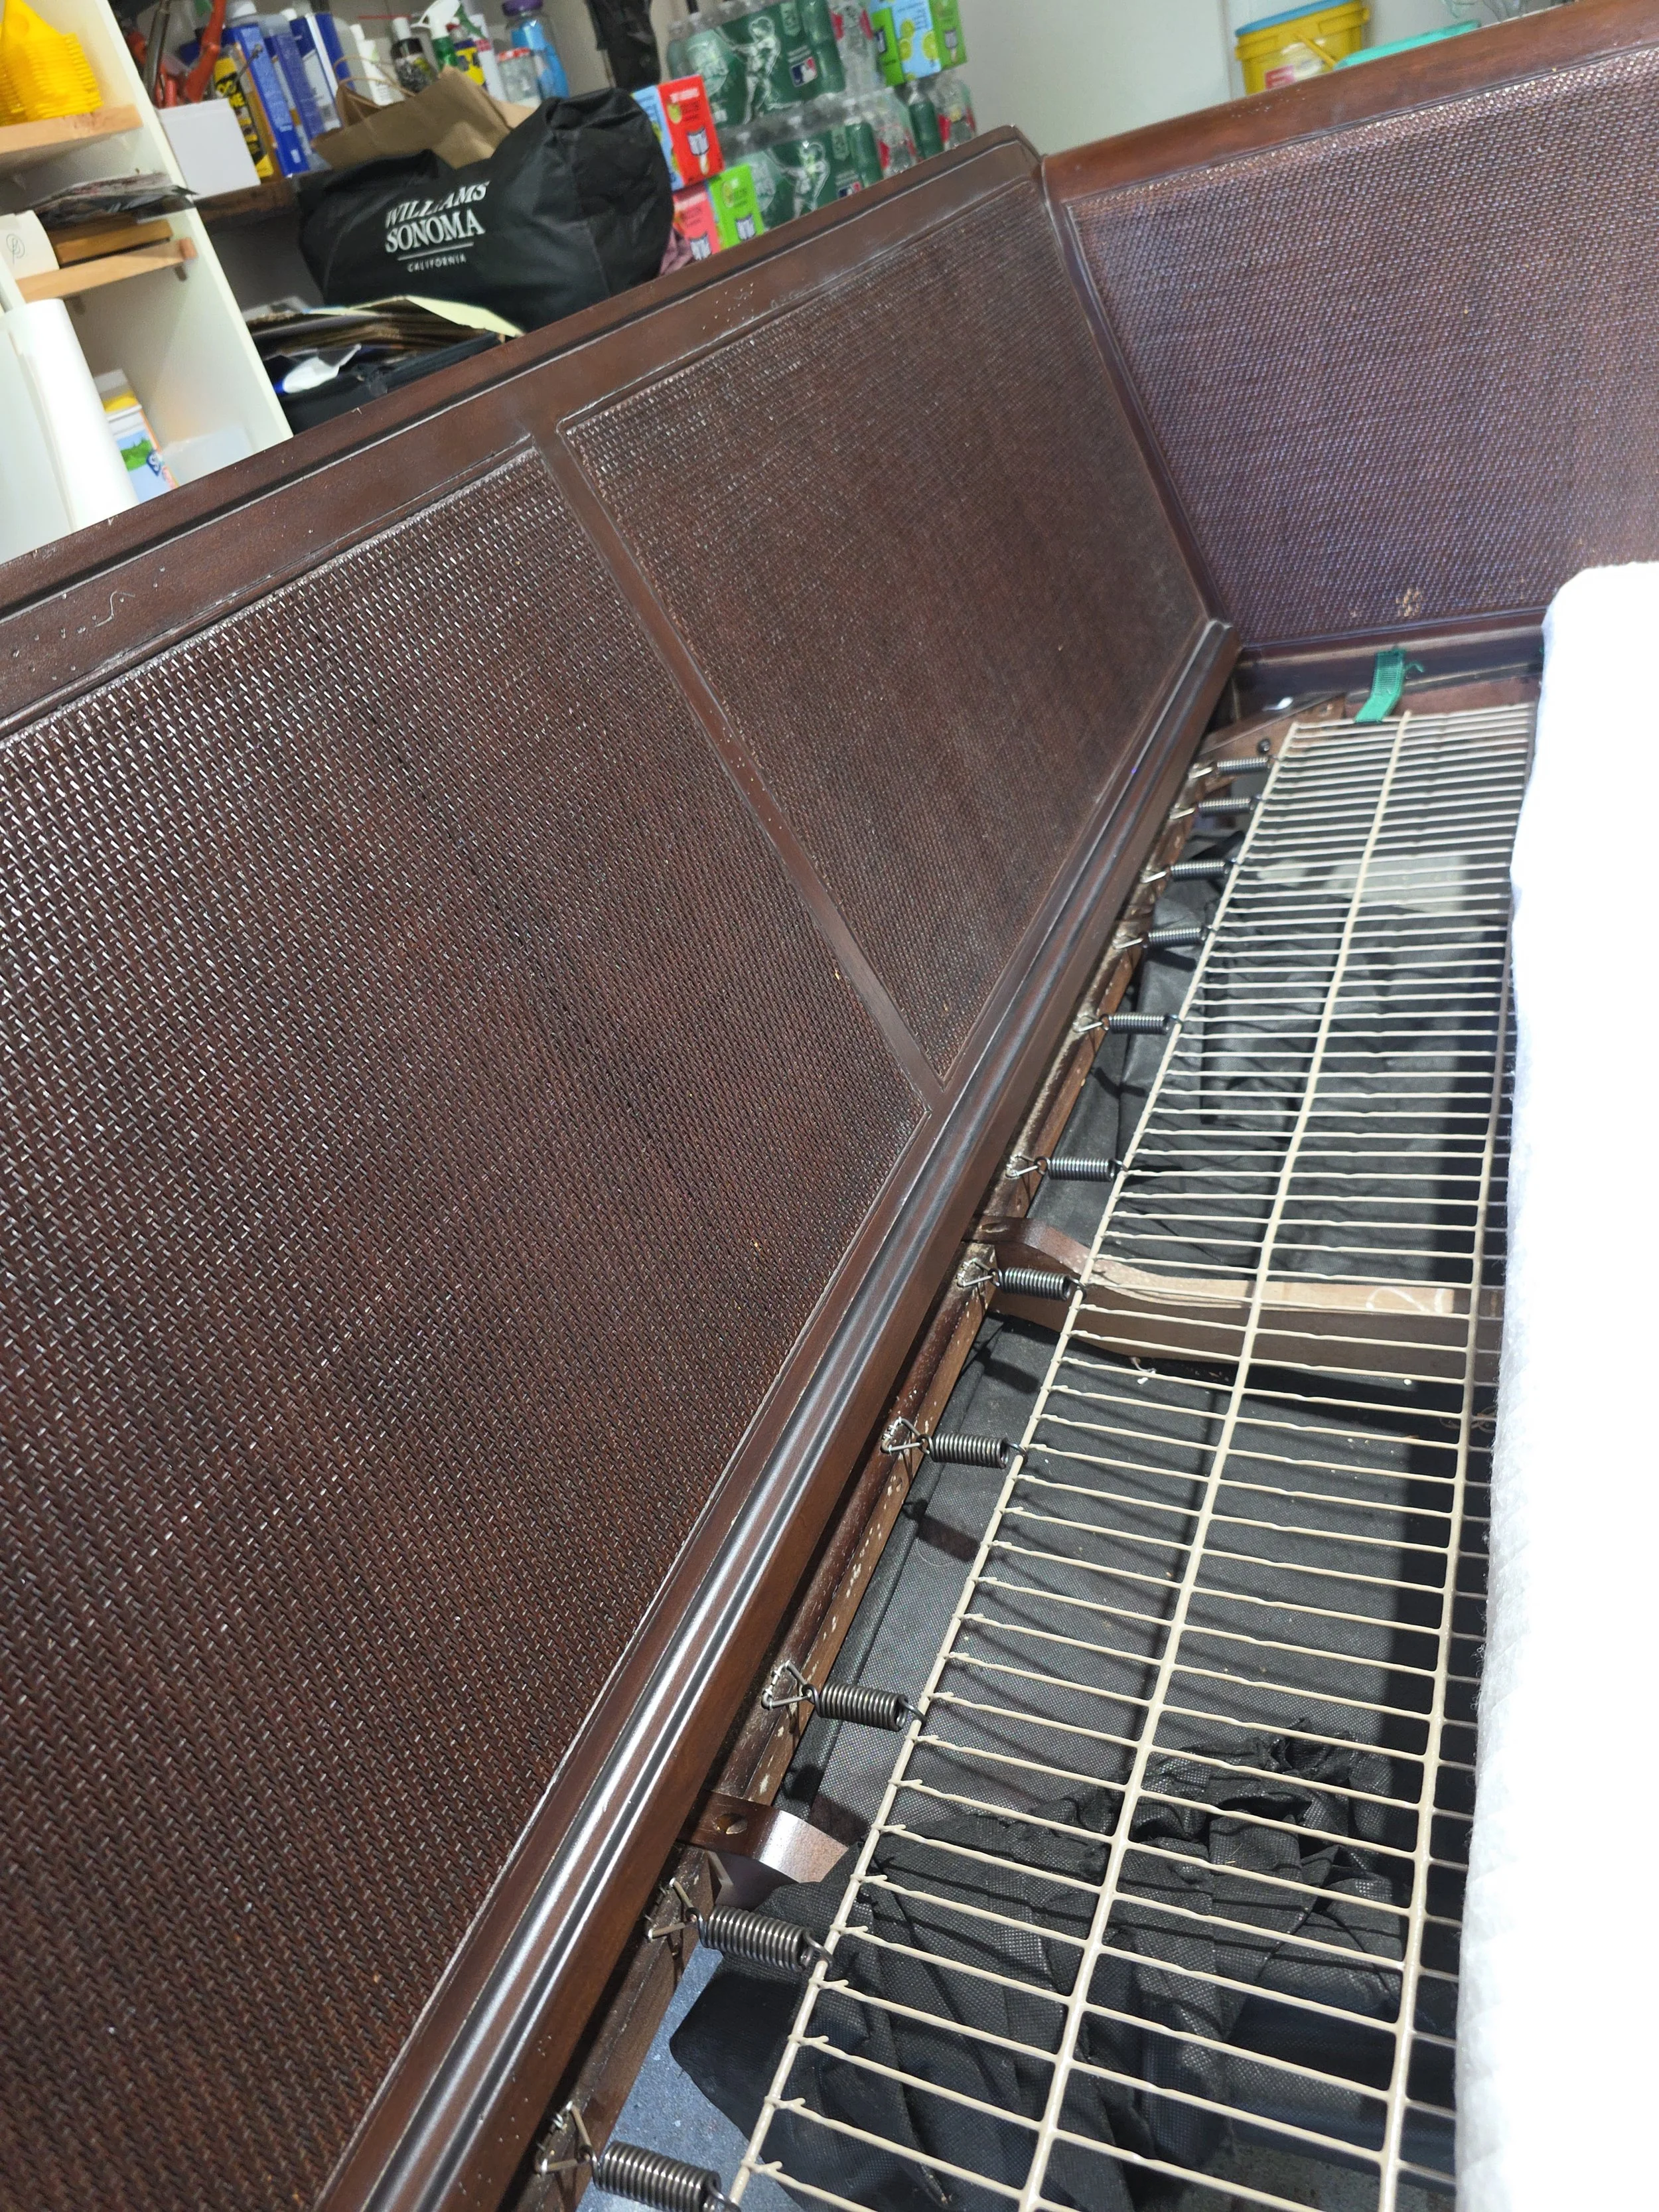
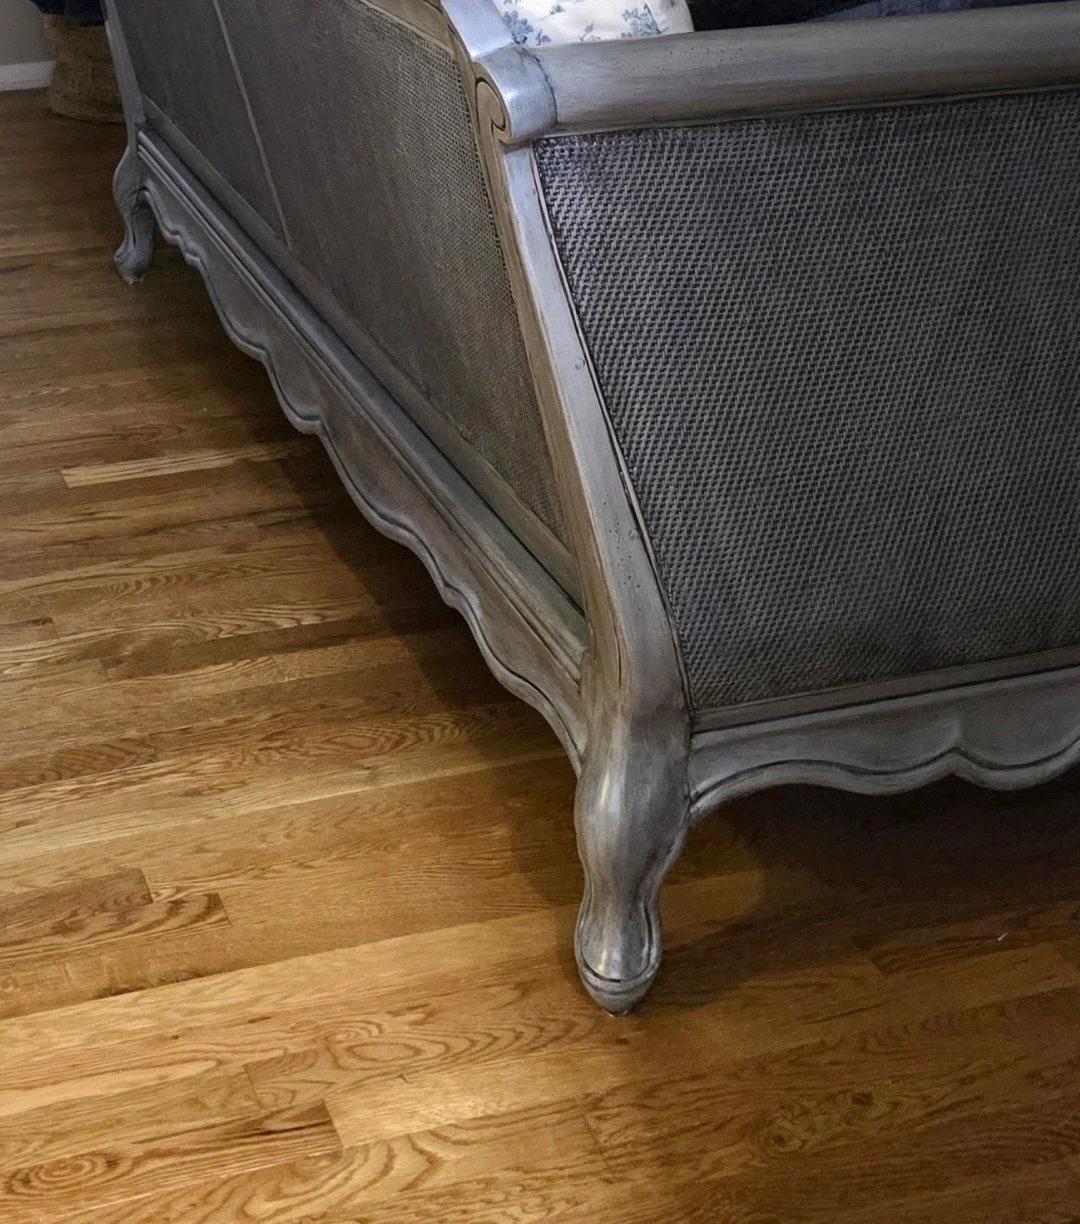
Liza was very traditional and I am not, but I always wanted a wood sofa. As soon as I saw her I knew she would be gray and blue. I had the cushions professionally recovered, (sewing is yet to be in my repertoire), and I covered the original pillows with covers I purchased from Amazon. She is painted gray and has a black wash to show would grain and detailing. The rattan sides and back was a beast! I wanted them to have the black wash detailing that the wood had, but it simply could not be done in the same way. I ended up painting the rattan black and using a gray dry brush technique. The project was difficult, but in the end I have a very comfortable wood sofa that suits my taste.
Introducing: “Ariel”
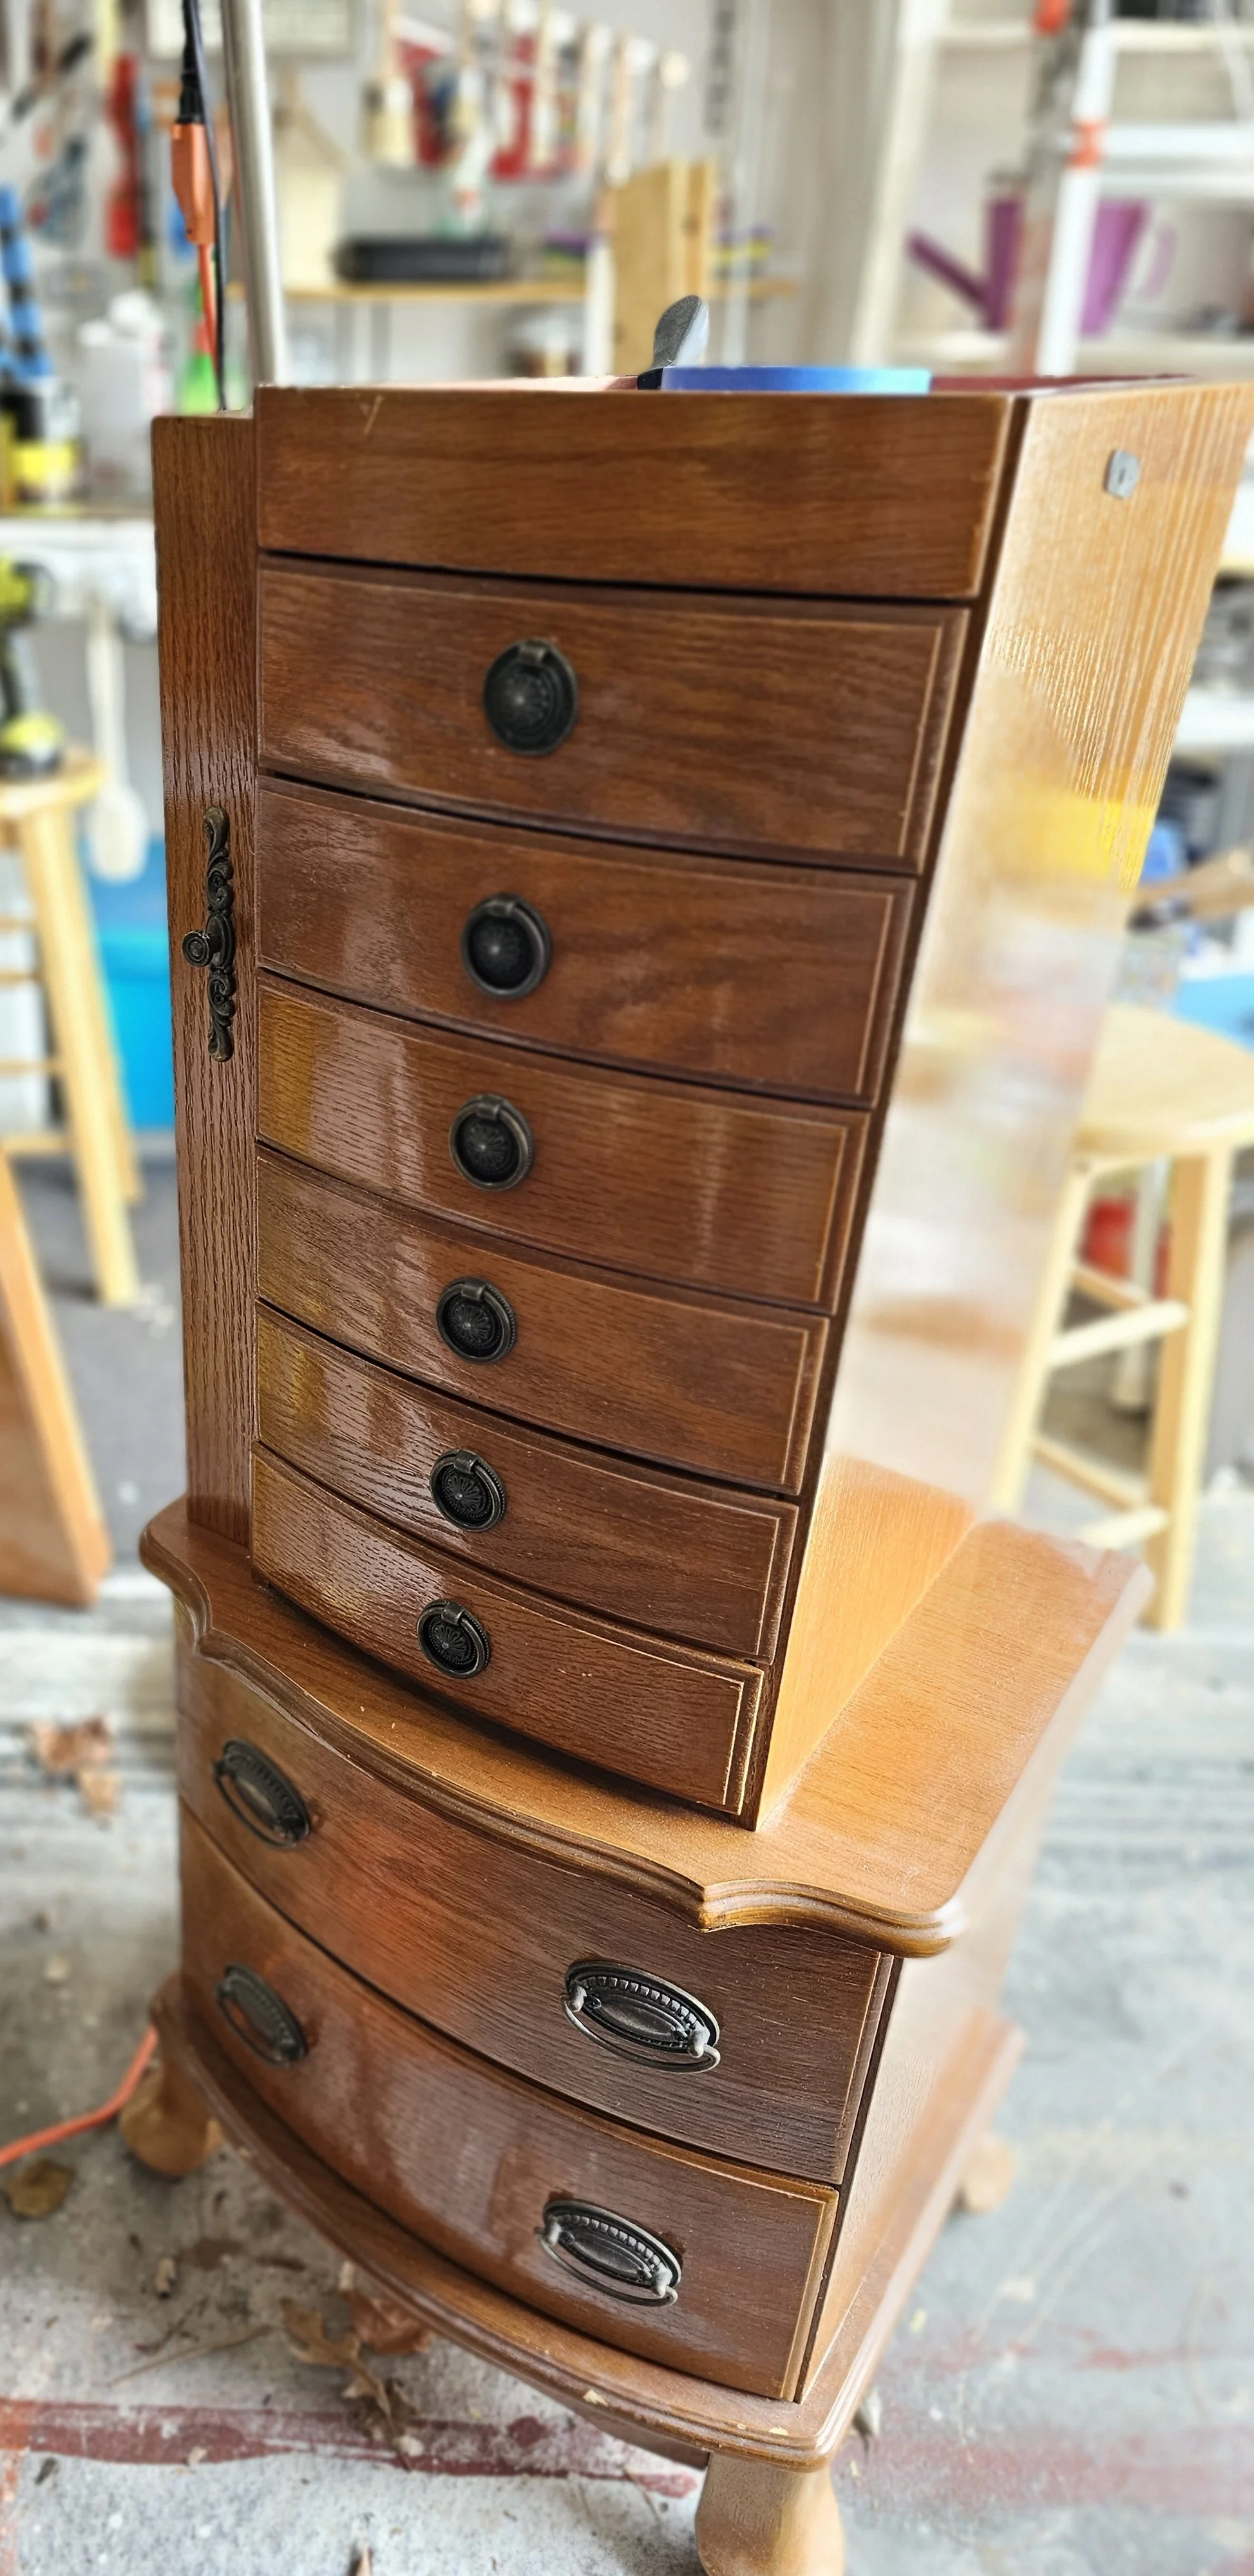
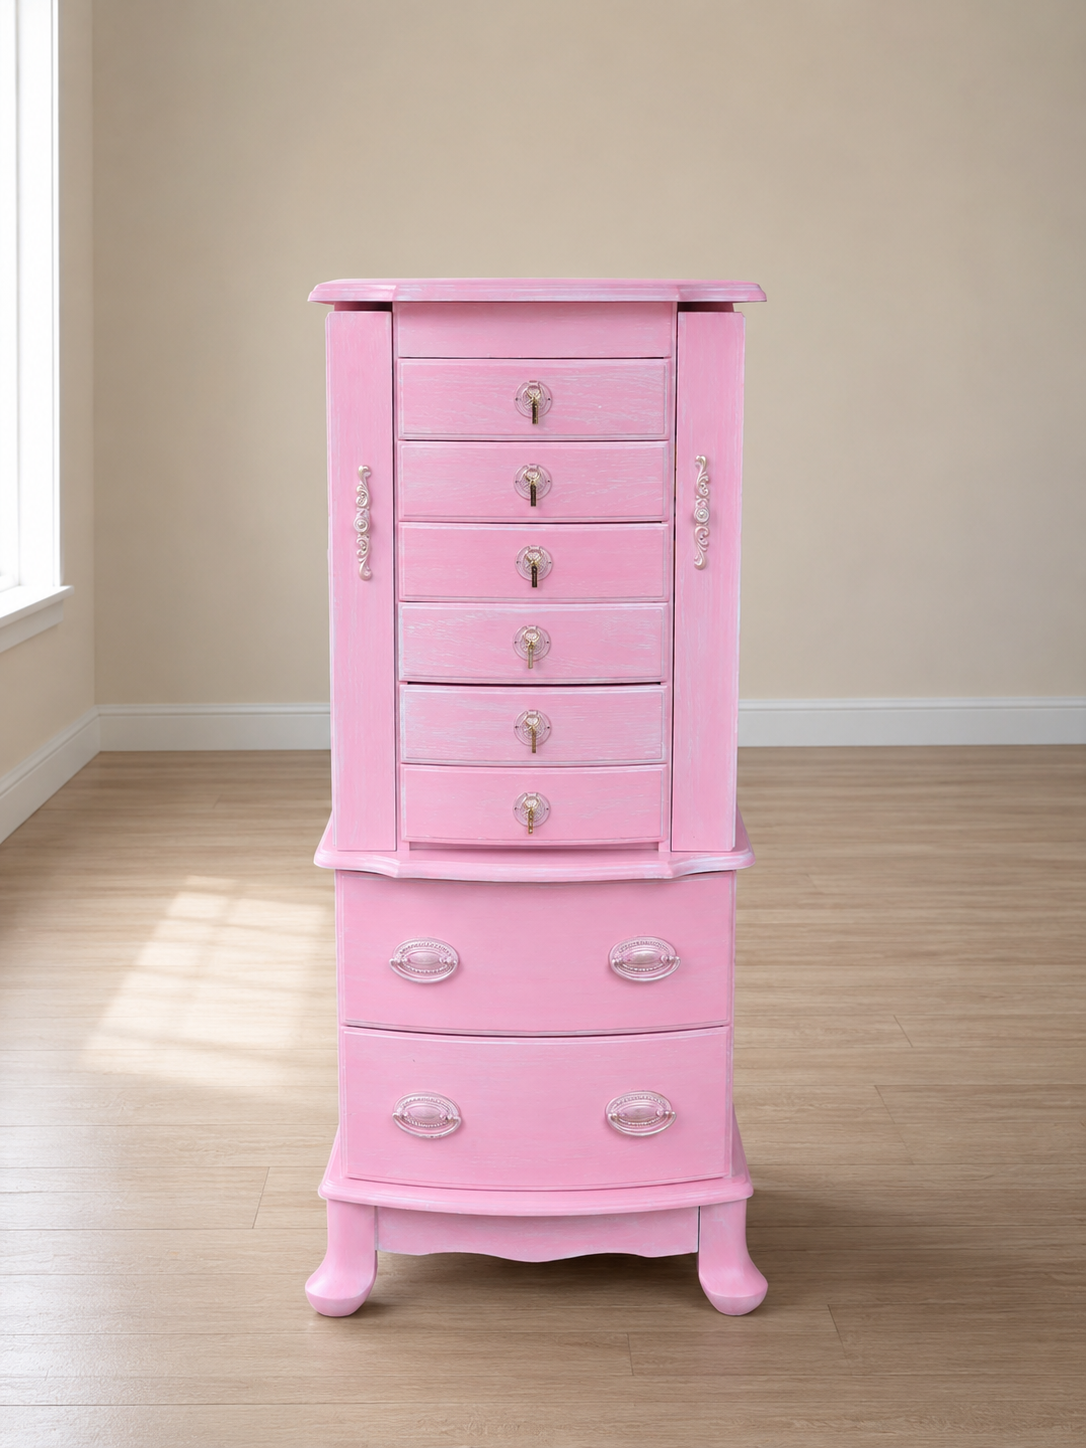
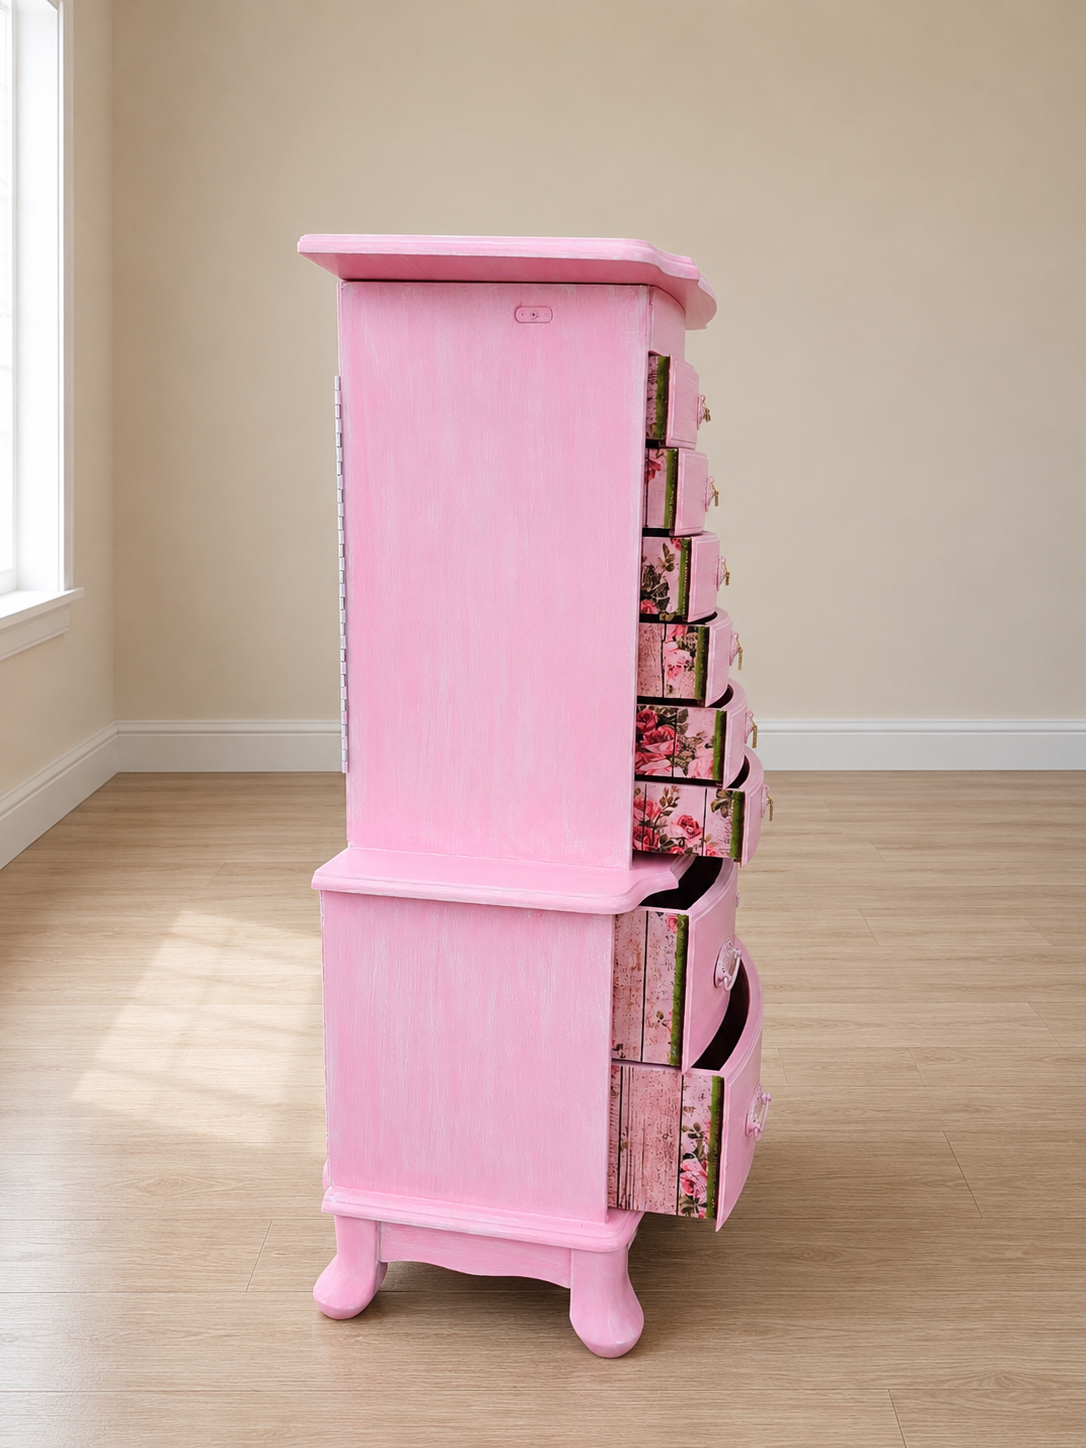
I gave this jewelry armoire new life specifically for my niece, Ariel. She picked the color and I told her I would make it special. For me it was a whirlwind of “firsts,” including taking before and after pictures! I dove right in, took the top and sides off and then took the before. (I have since gotten better at taking before pictures).
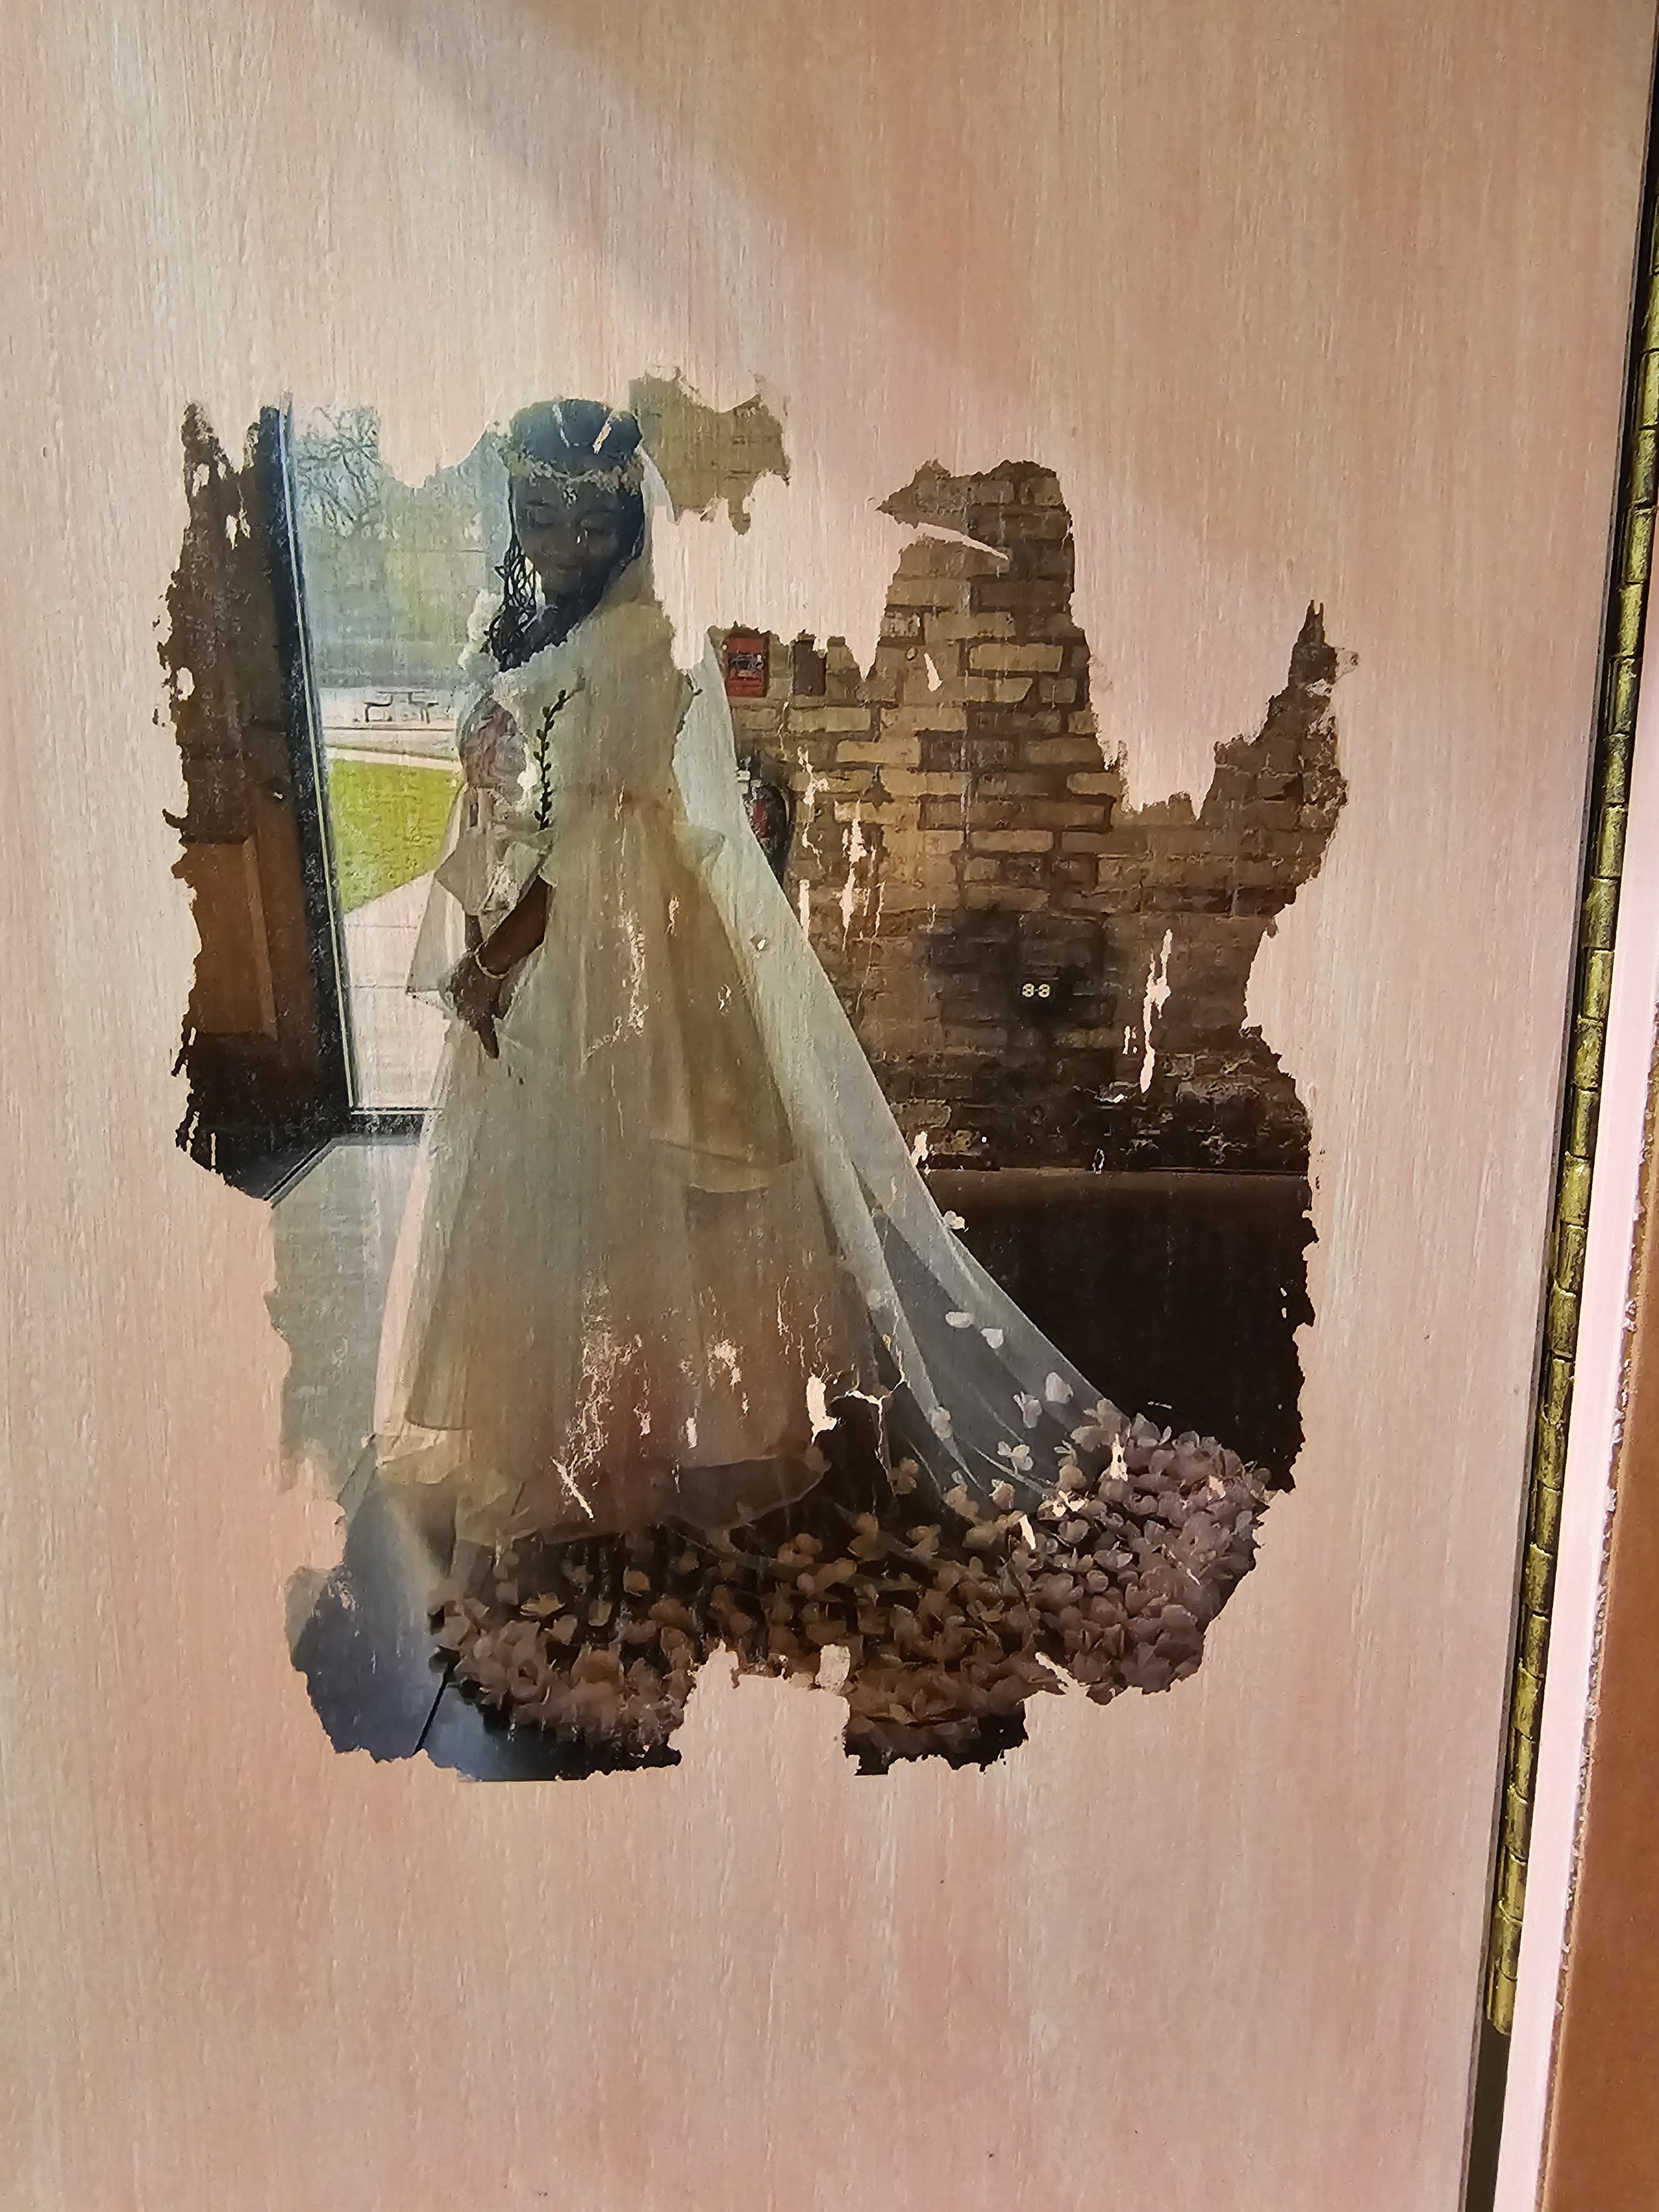
*The 2 after photos backgrounds are provided by AI, ChatGBT
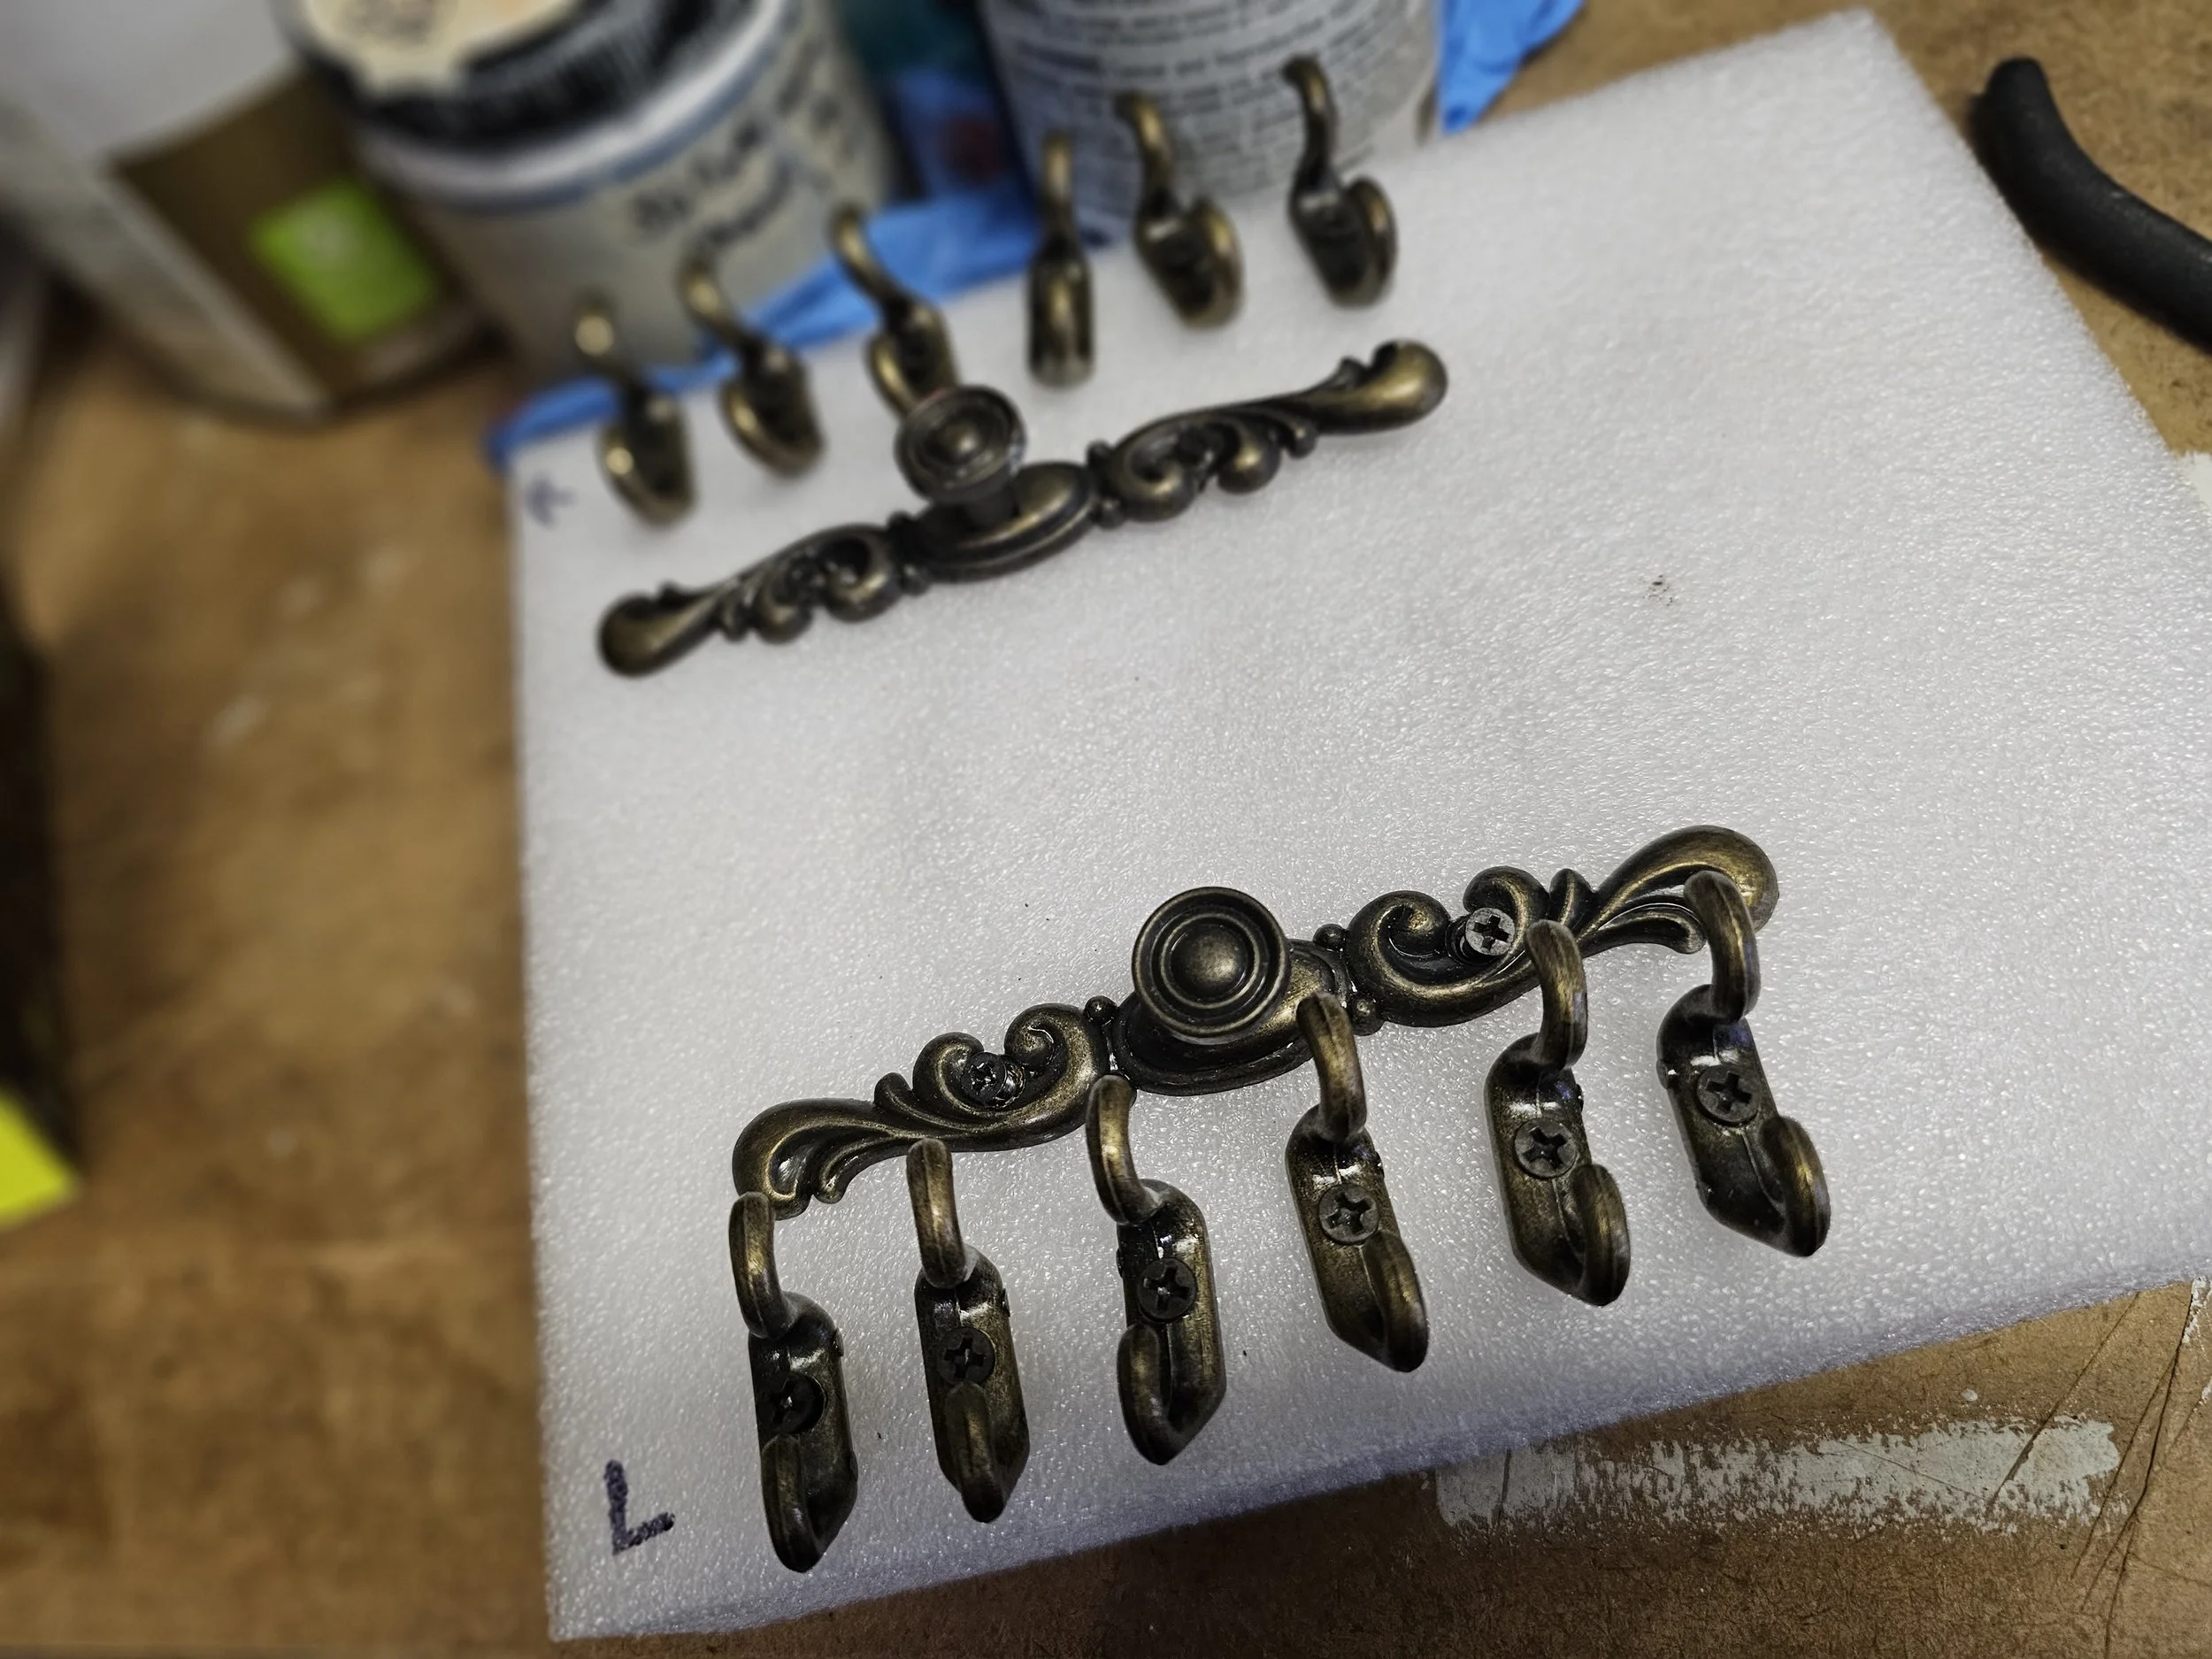
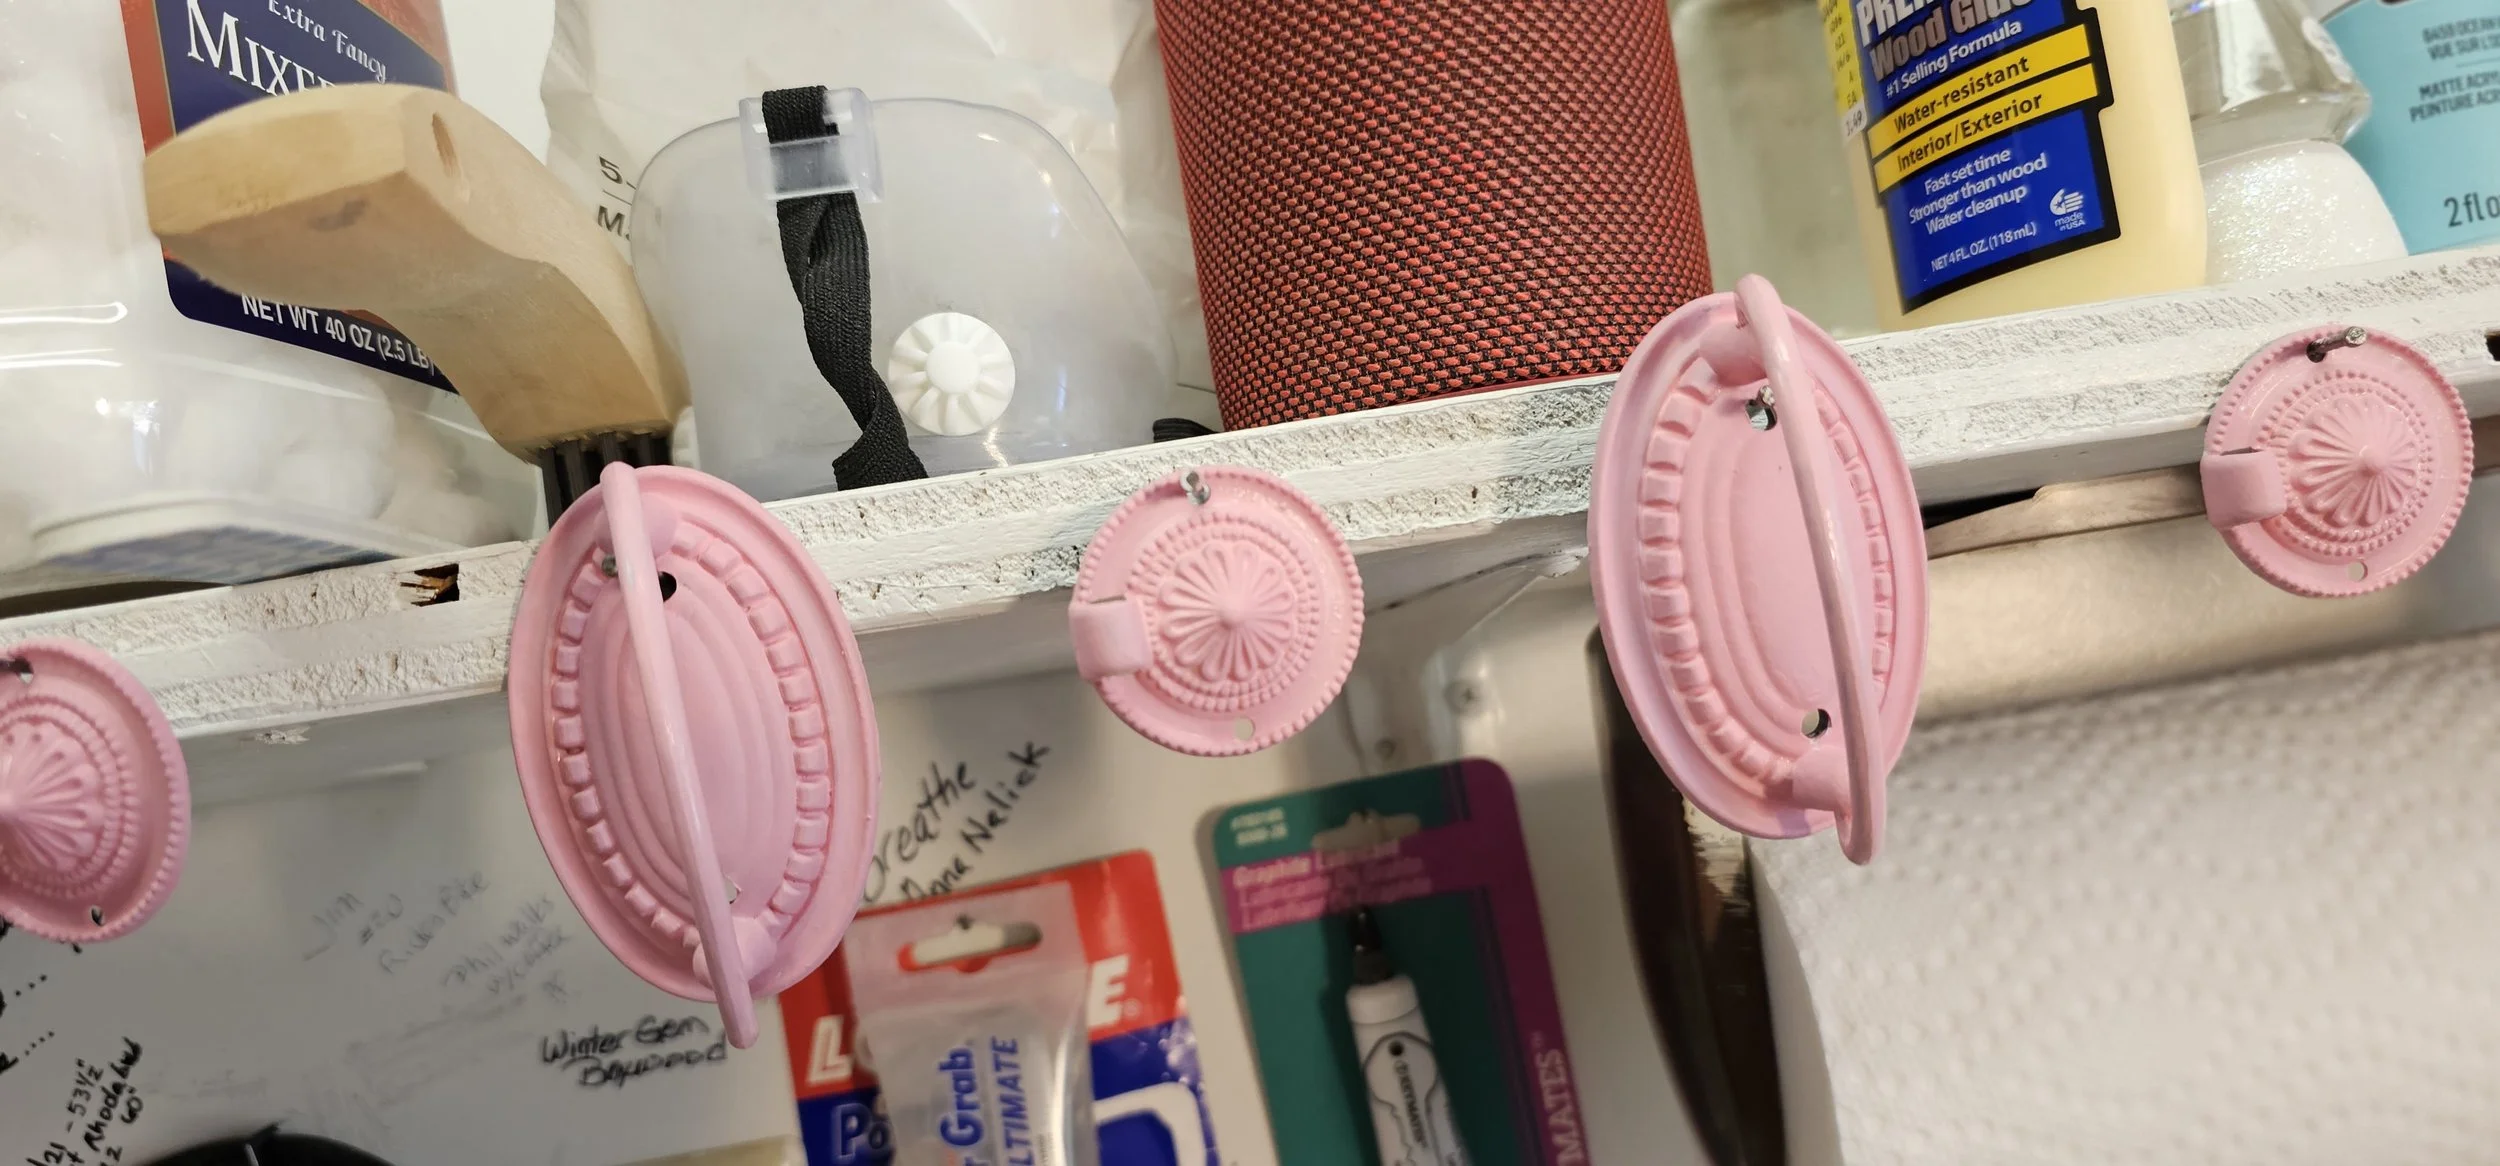
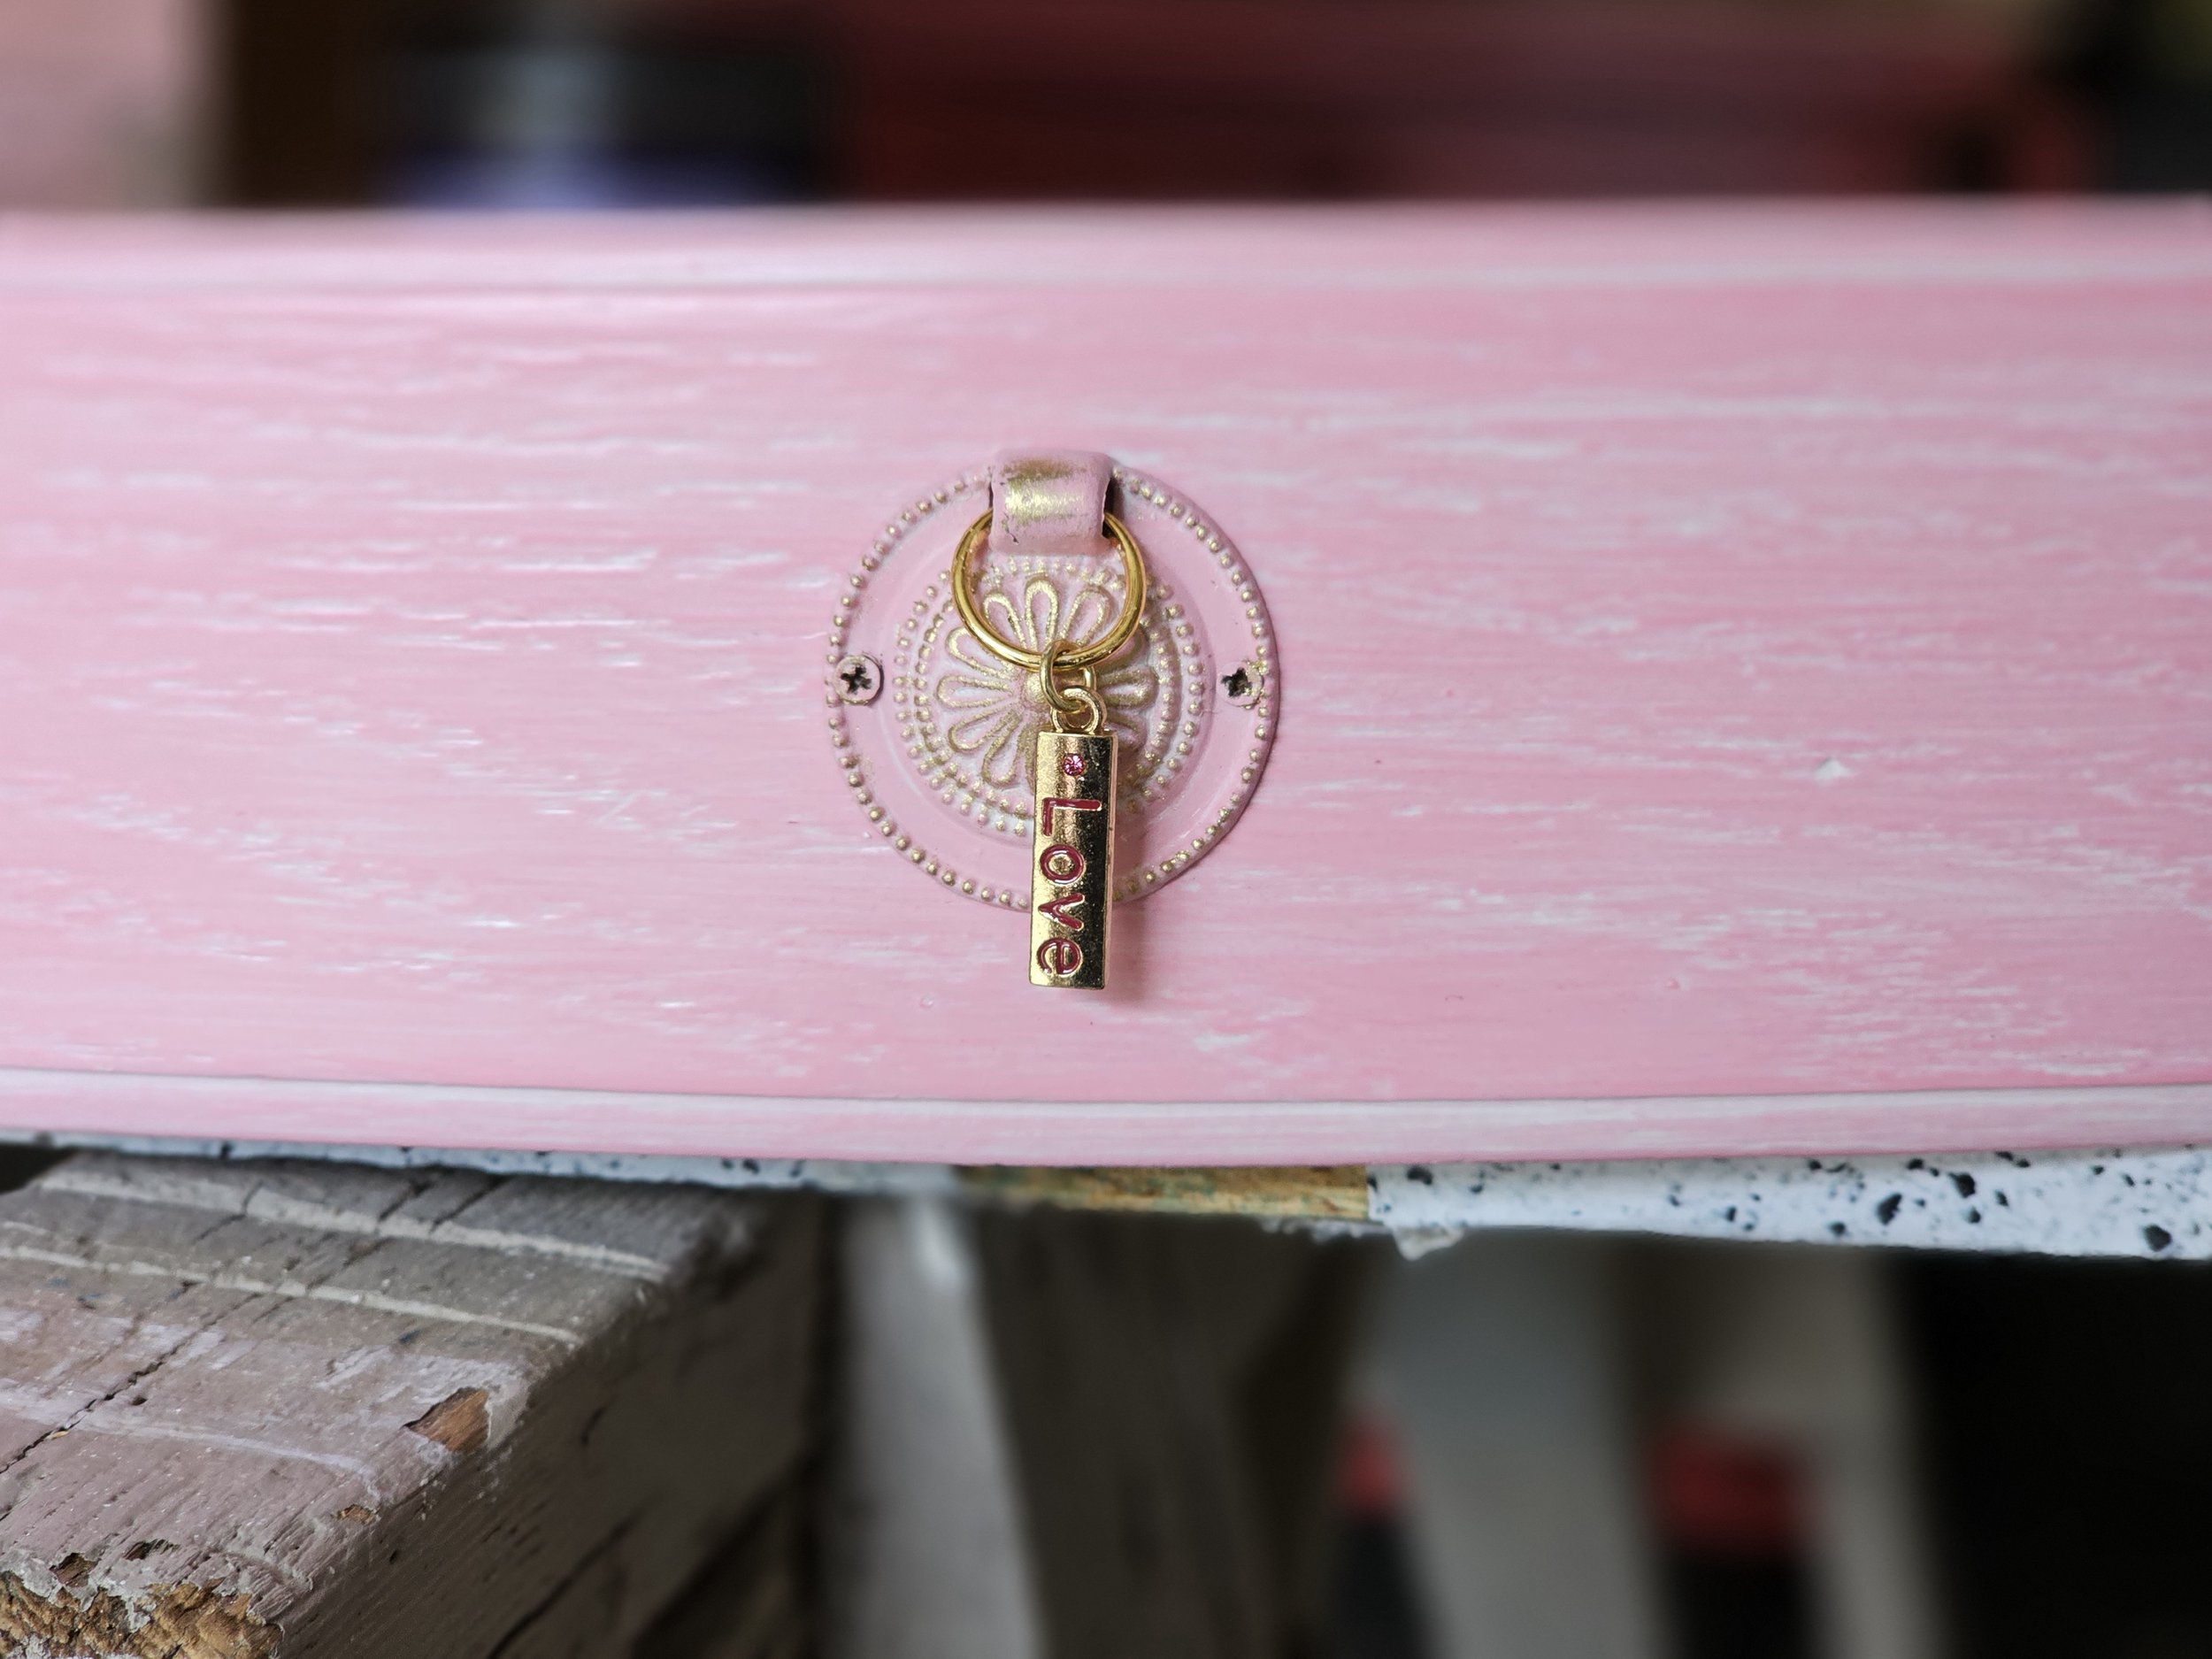
I wanted to use the original hardware but one of the 6 top pull rings was missing. Off to the hobby store for inspiration! I love the little “word” charms! Just perfect!
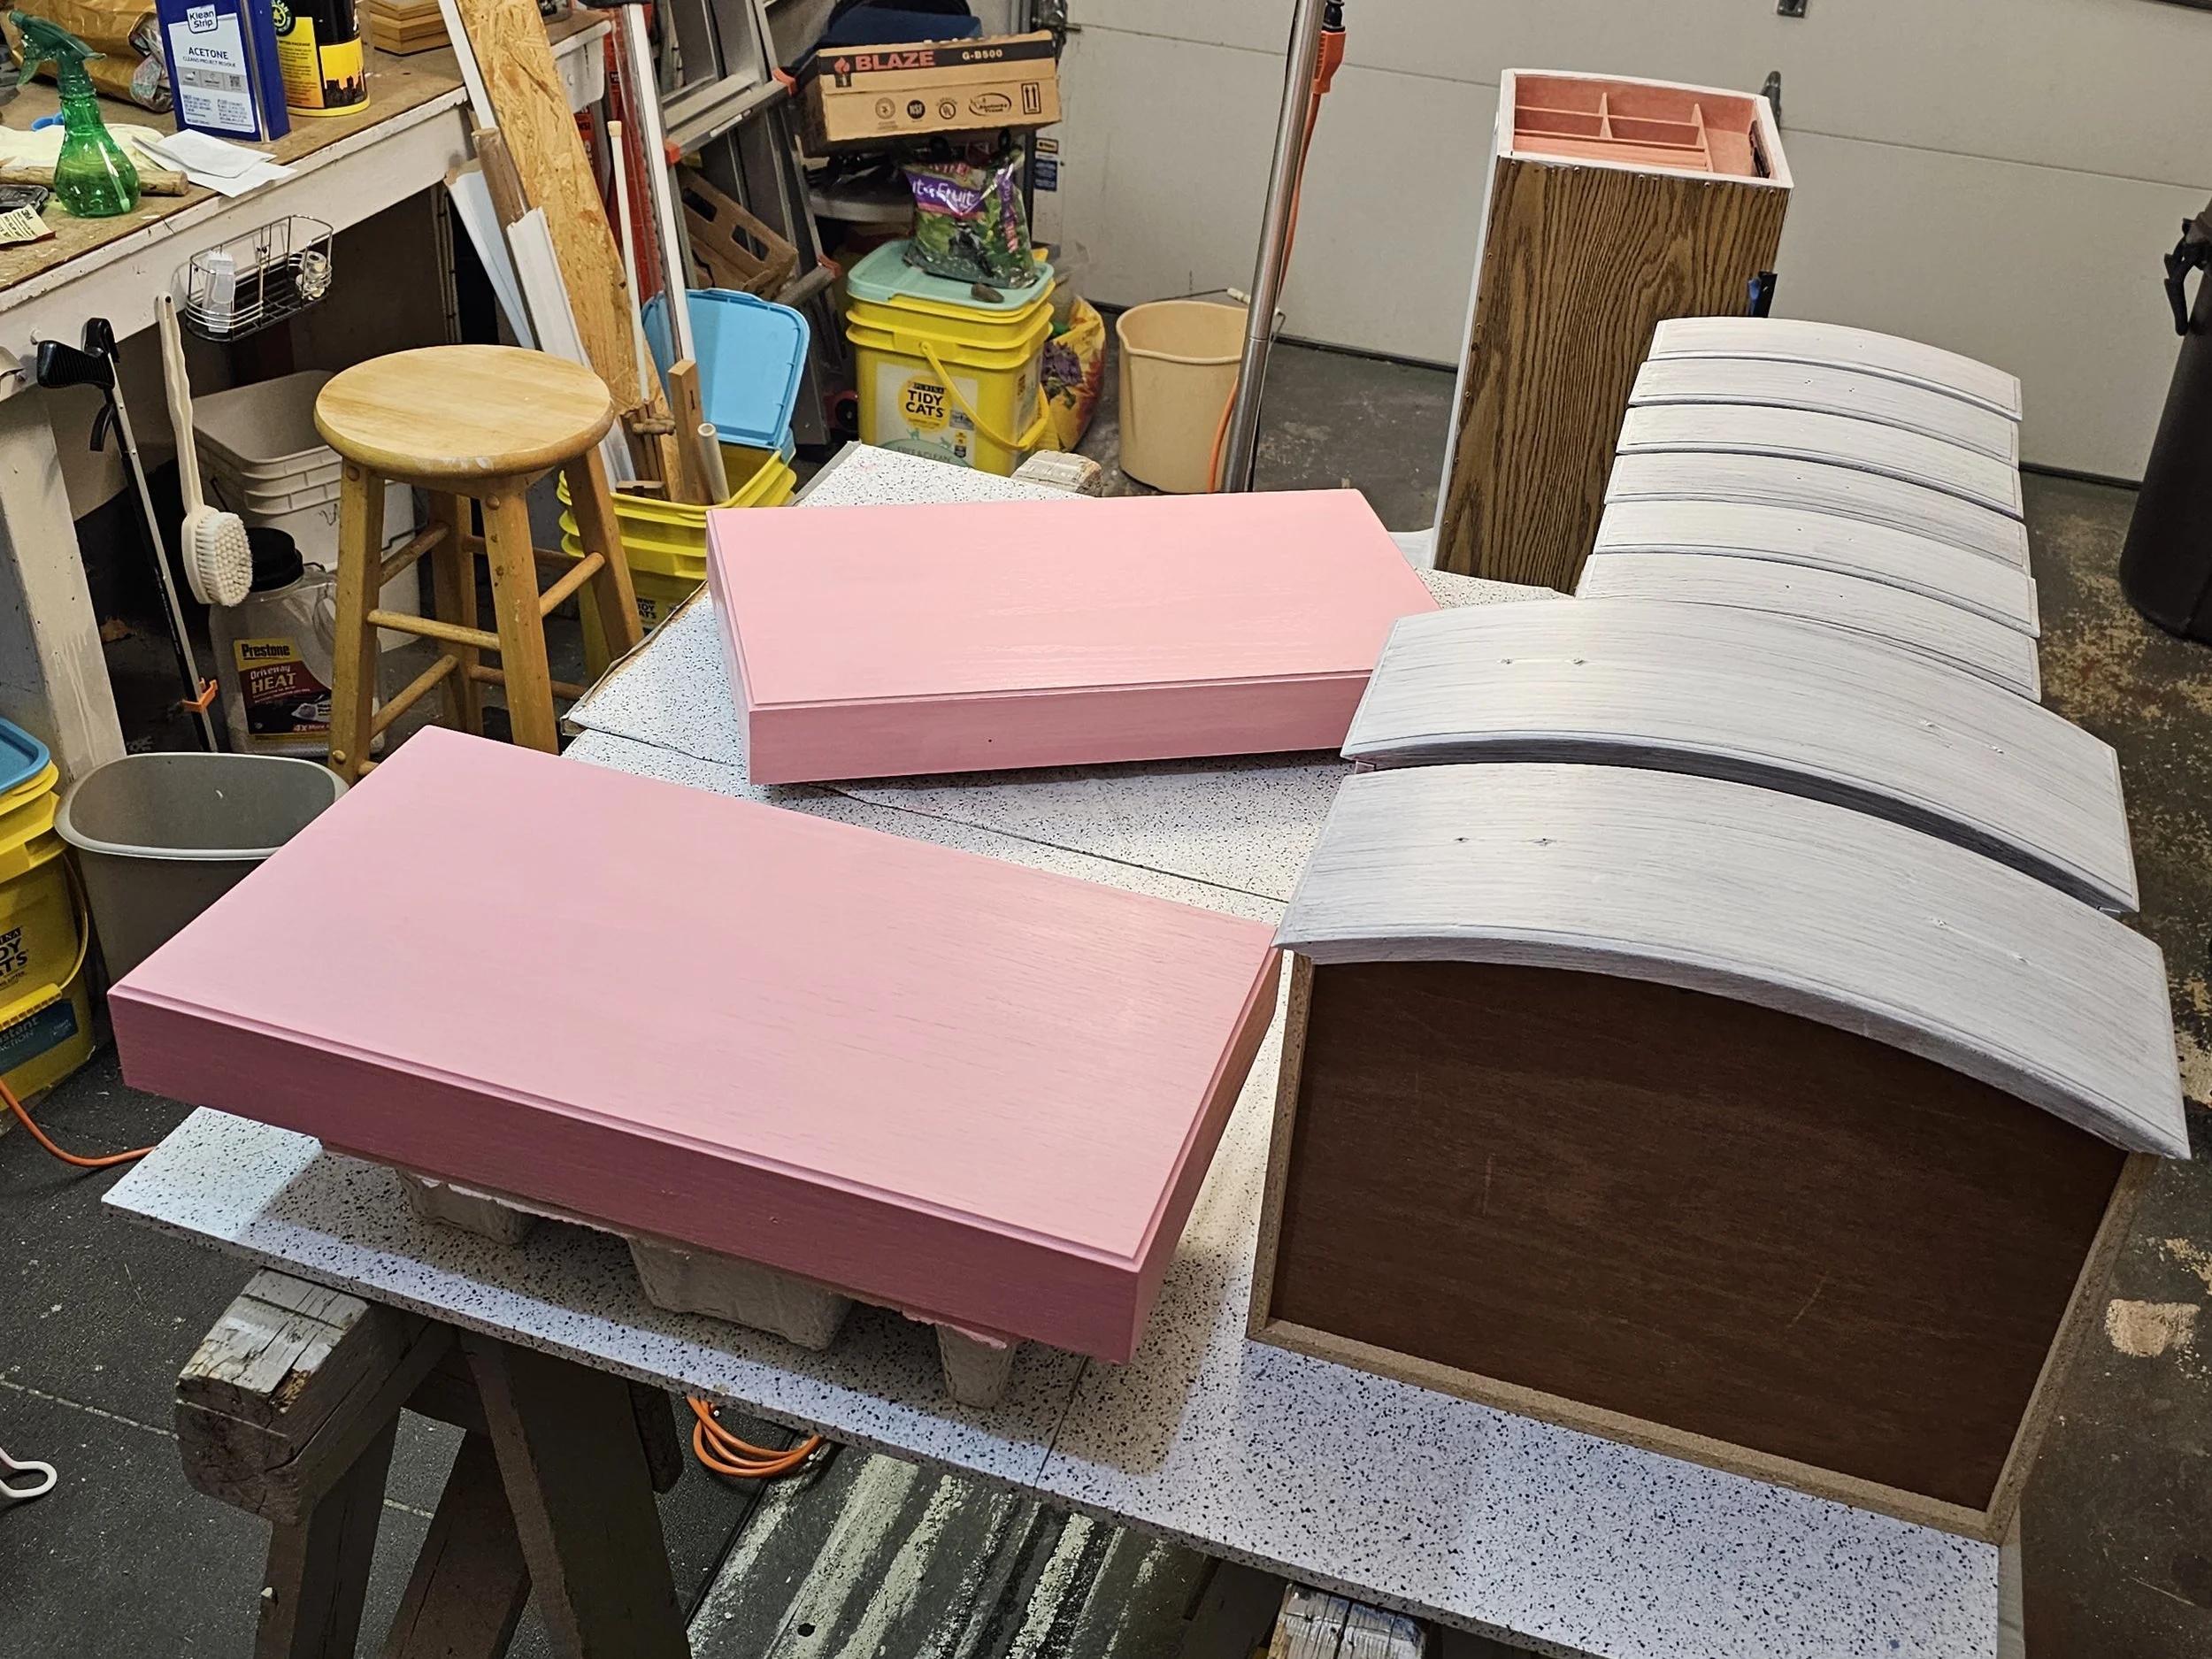
There is just so much prep that goes into projects like this that it makes sense to be doing more than one thing at a time. While I’m waiting for primer to dry on one piece I am painting the first coat of color on another. While the doors are drying I’m doing decoupage on the sides of the drawers.
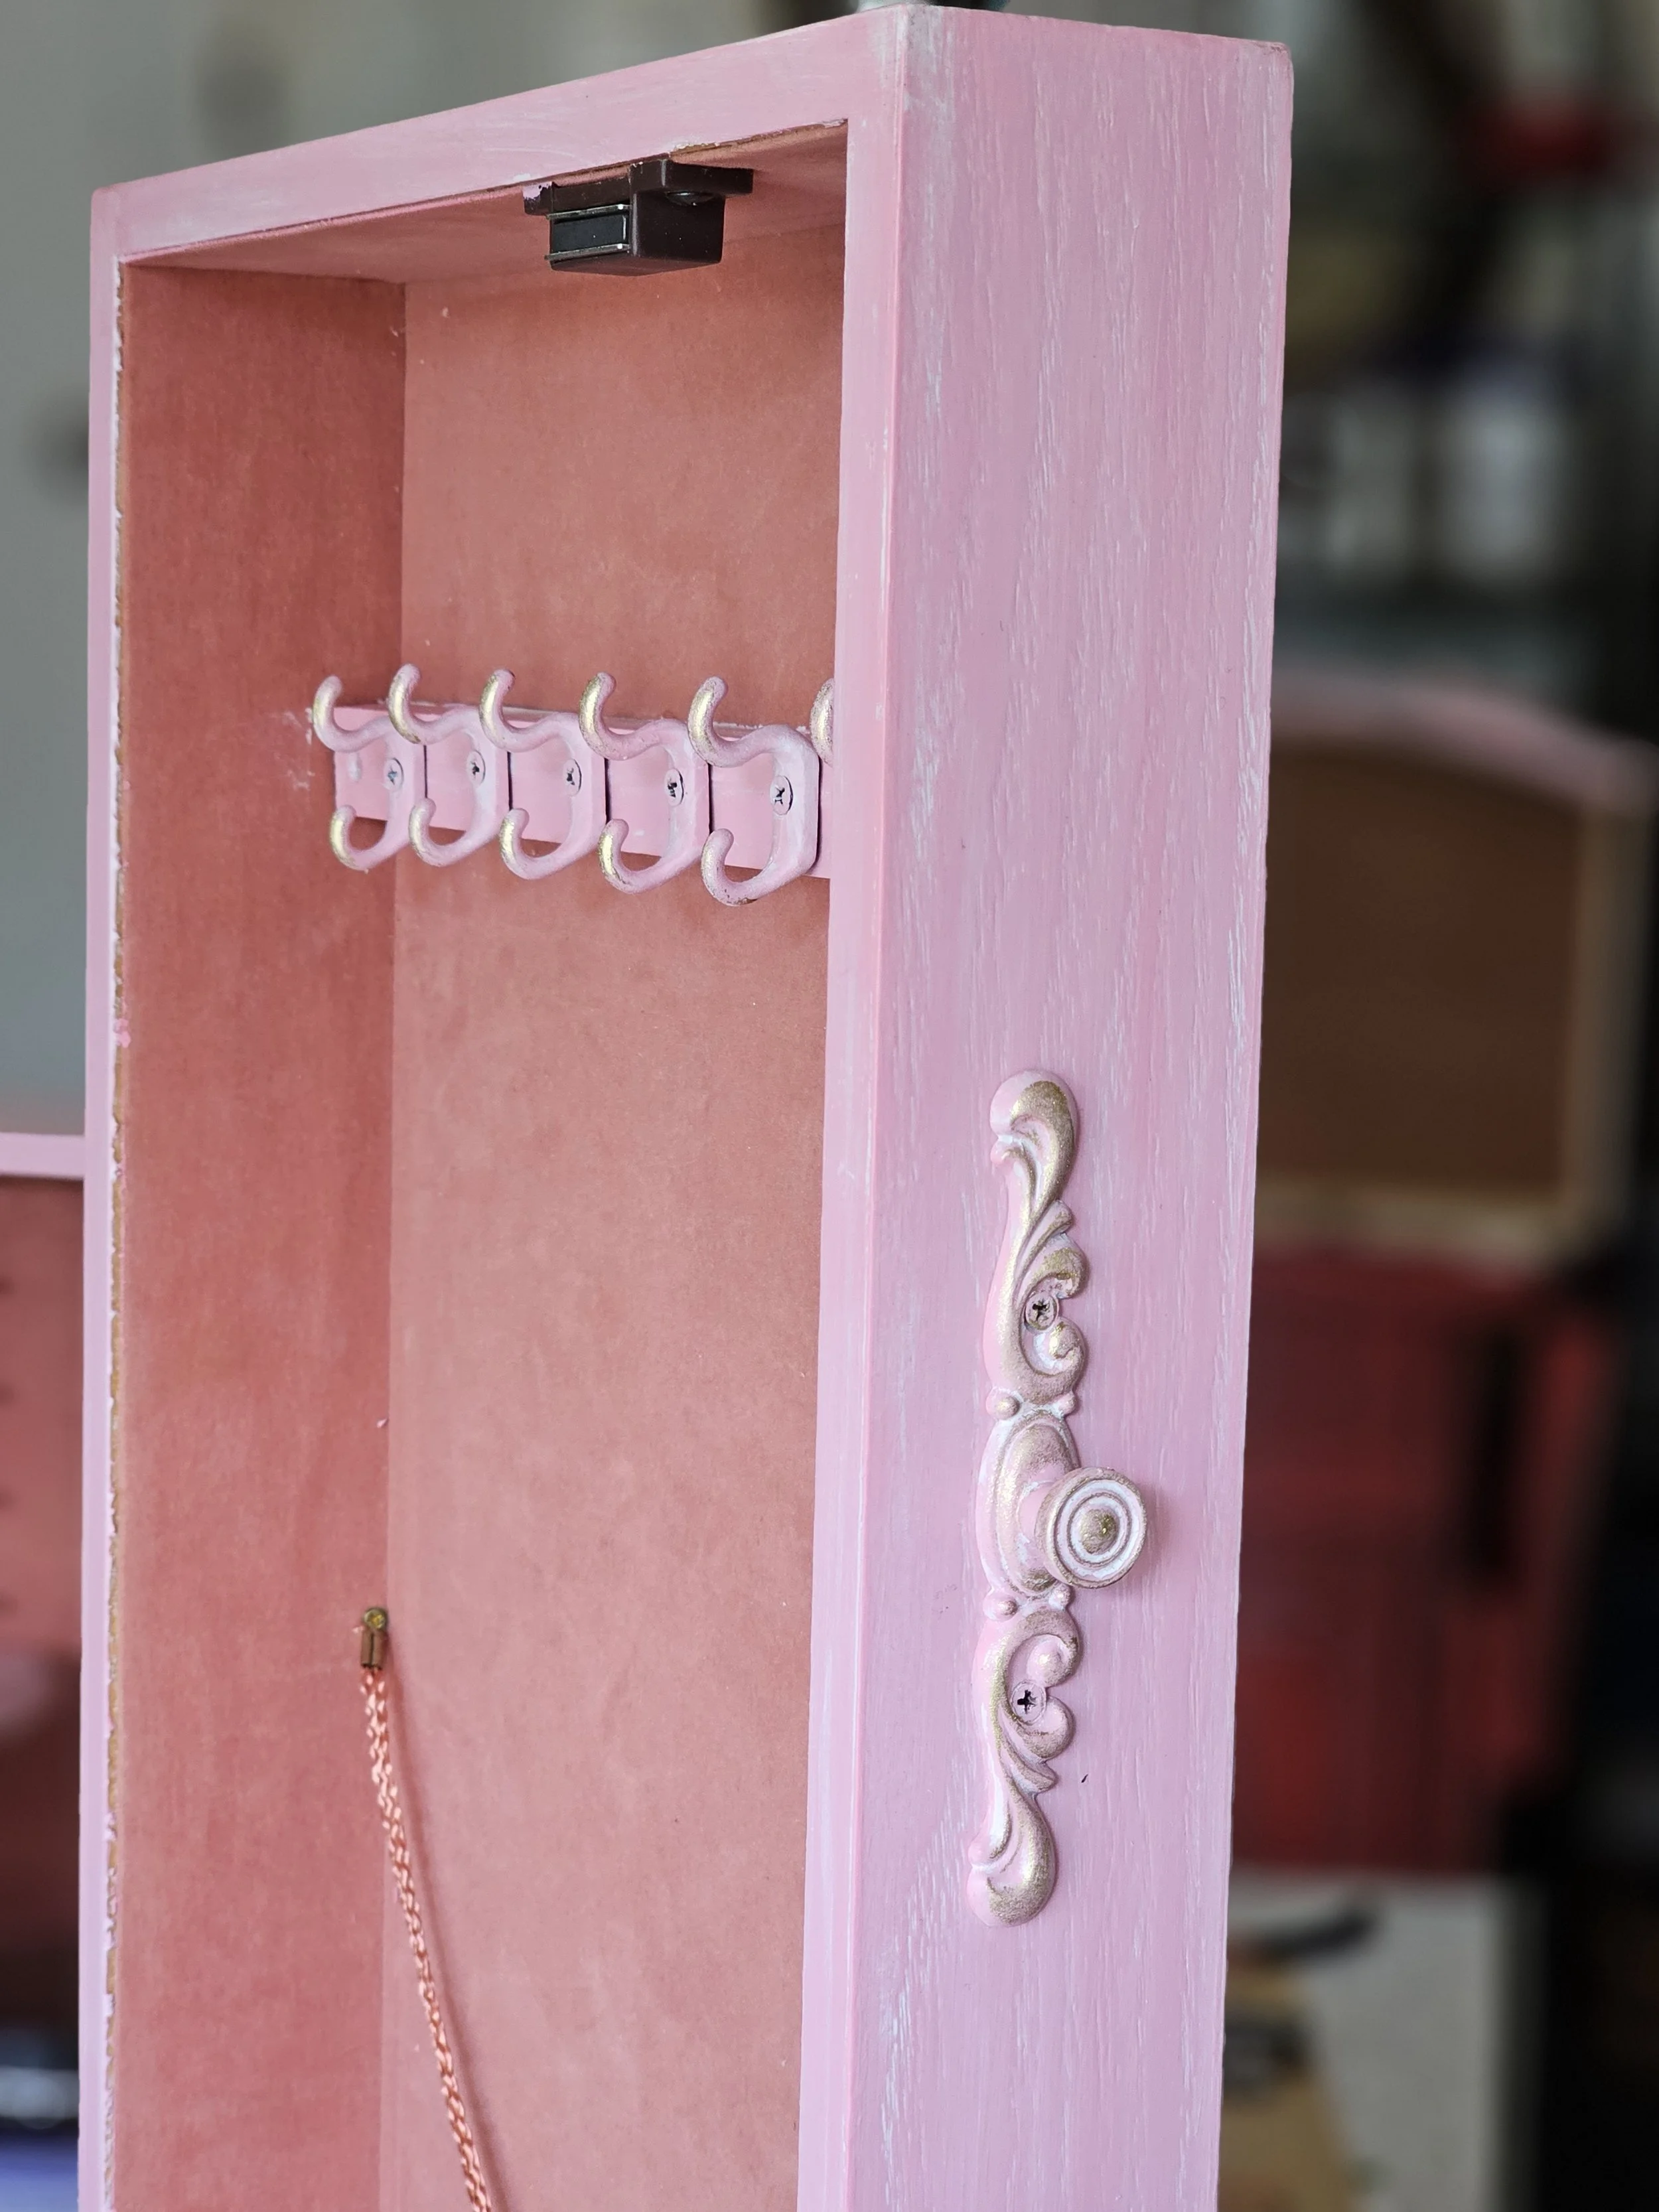
This might be my favorite part. Ariel and David were recently married so I did a photo transfer on each side to see when she opens the doors. (Yes, there were happy tears).
This was probably my favorite project so far. It was my mother’s jewelry armoire and it brought me so much joy giving it new life for my sweet niece. If you have any questions I am happy to share. LiveChangeRepeat@gmail.com

This is my first experience using colored finishing wax. I wish I had more shots of the process. As you can see it was a brown jewelry armoire. I painted it a light taupe color and applied black finishing wax. I had knob issues which is why 2 are missing, I have since fixed that problem. This was a really inexpensive piece and I feel like I made it look a little richer.


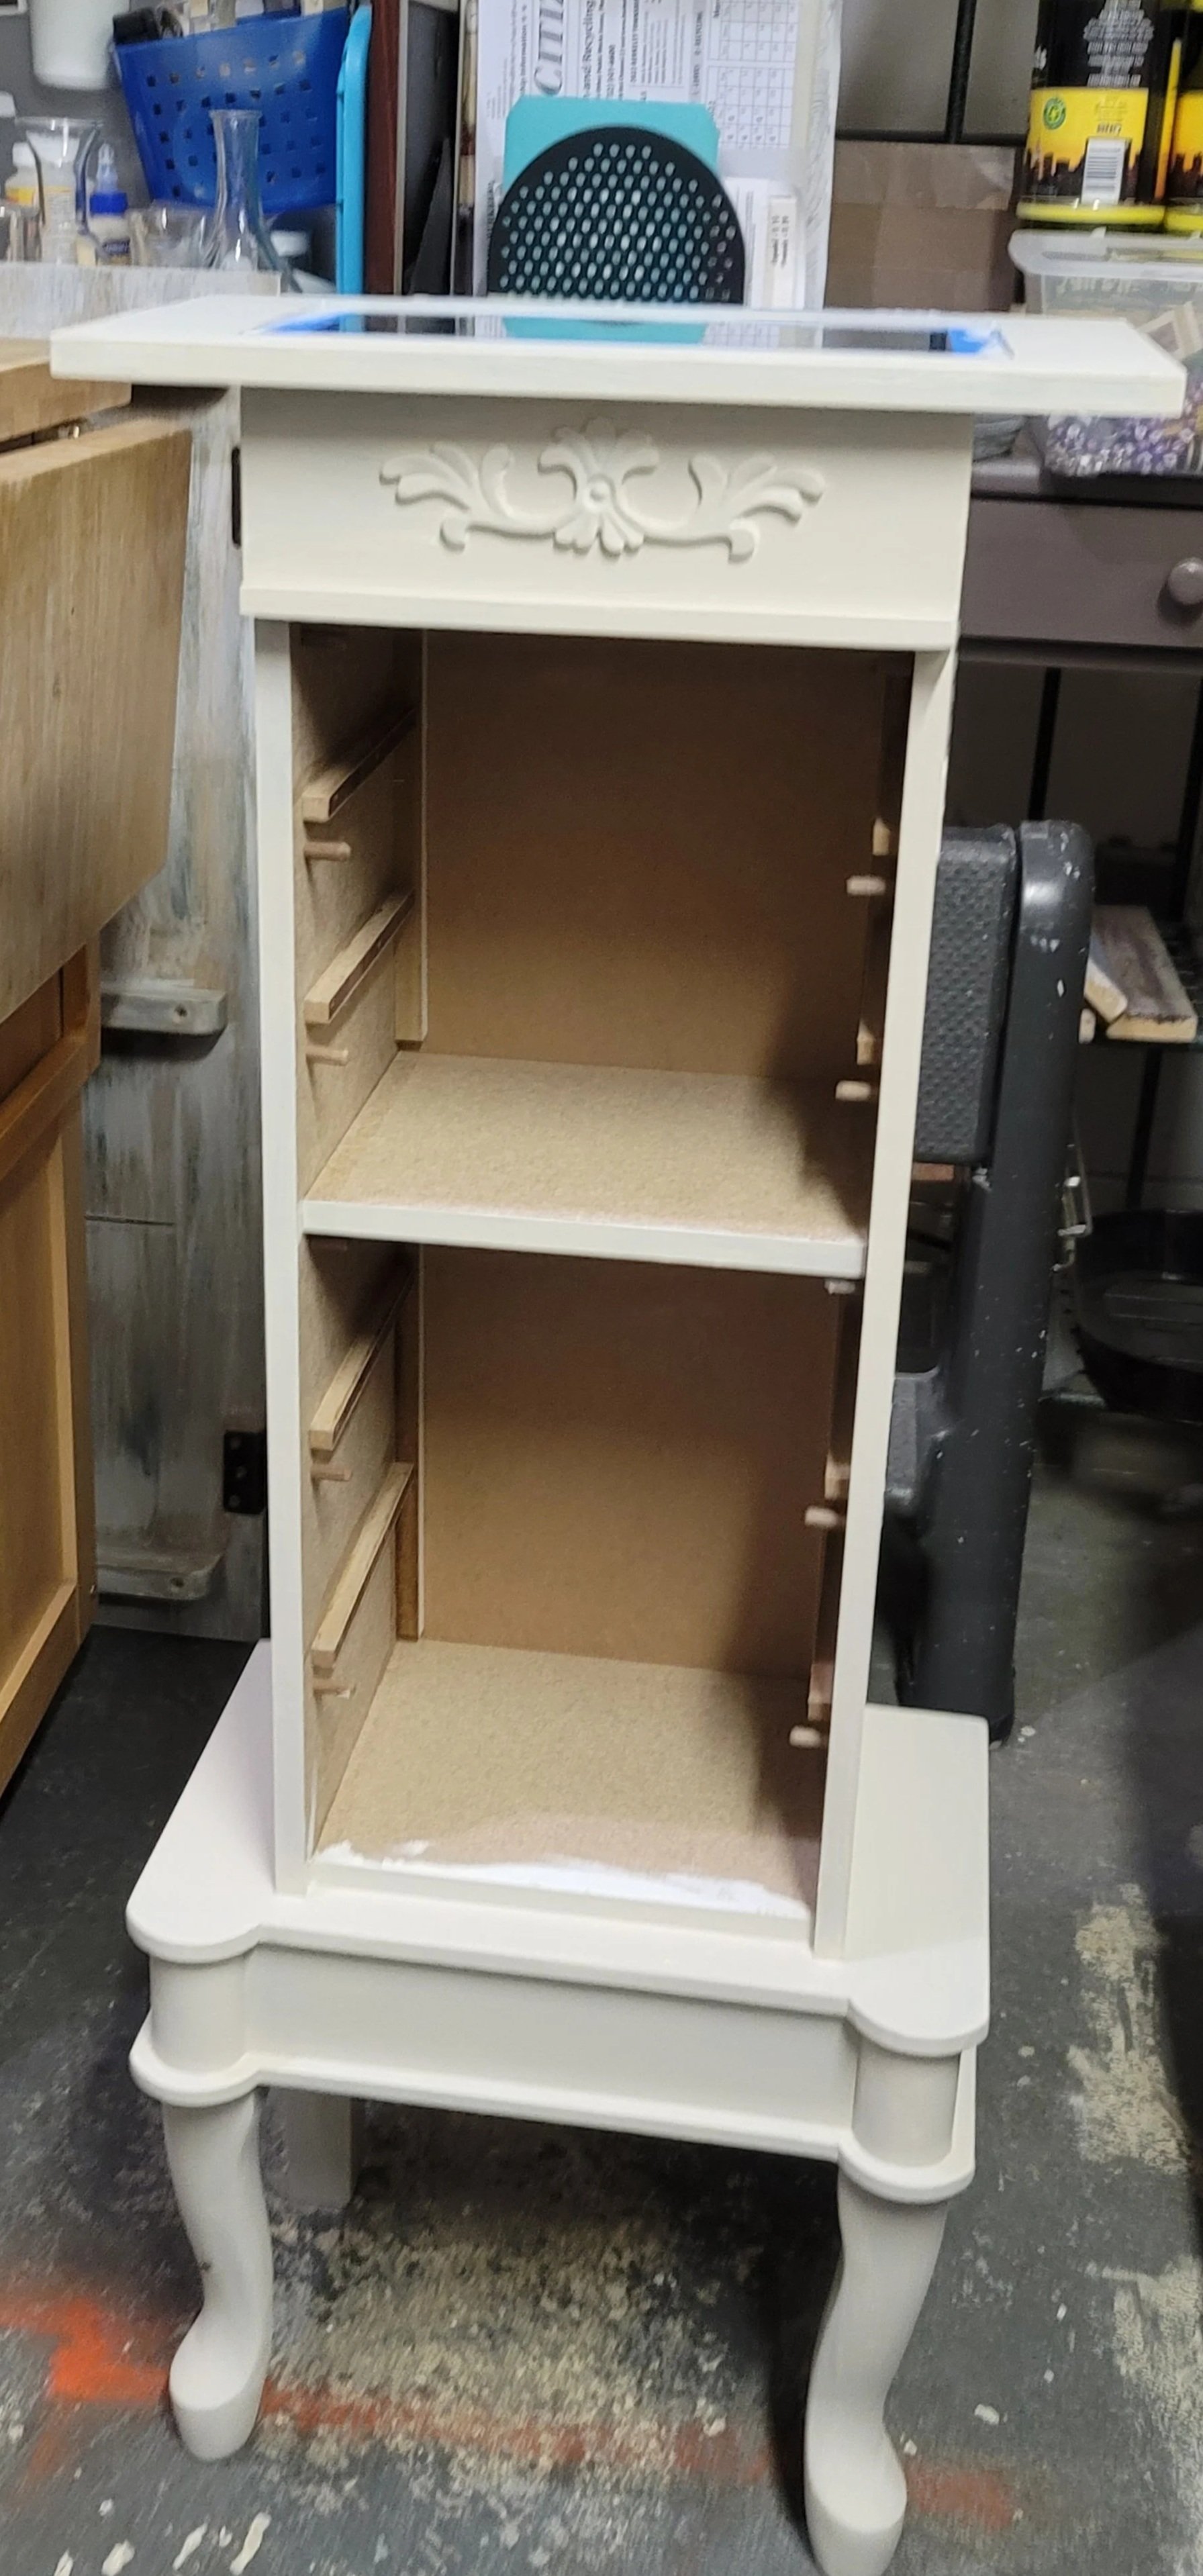

My favorite part of this project is the fact that I was able to match my bedroom set so well. I learned a lot doing this and later did another for my niece. I am currently transforming one…stay tuned!
Sorry for the terrible staging but it is not likely to get better any time soon! LOL
The guy in the background is my Dad while building the house I grew up in.

A simple dinette very used and in need of some work.


Somebody’s cute pup jumped on the chairs often and chewed on the leg.


A little wood putty and a lot of sanding…
…like it never even happened!


Taping - sanding - filling and painting.

With this bright light on the pedestal it looks lighter than it does in natural light. This picture really shows the detail that the wax creates.
This table had 2 leaves making it easily seat 8 people.
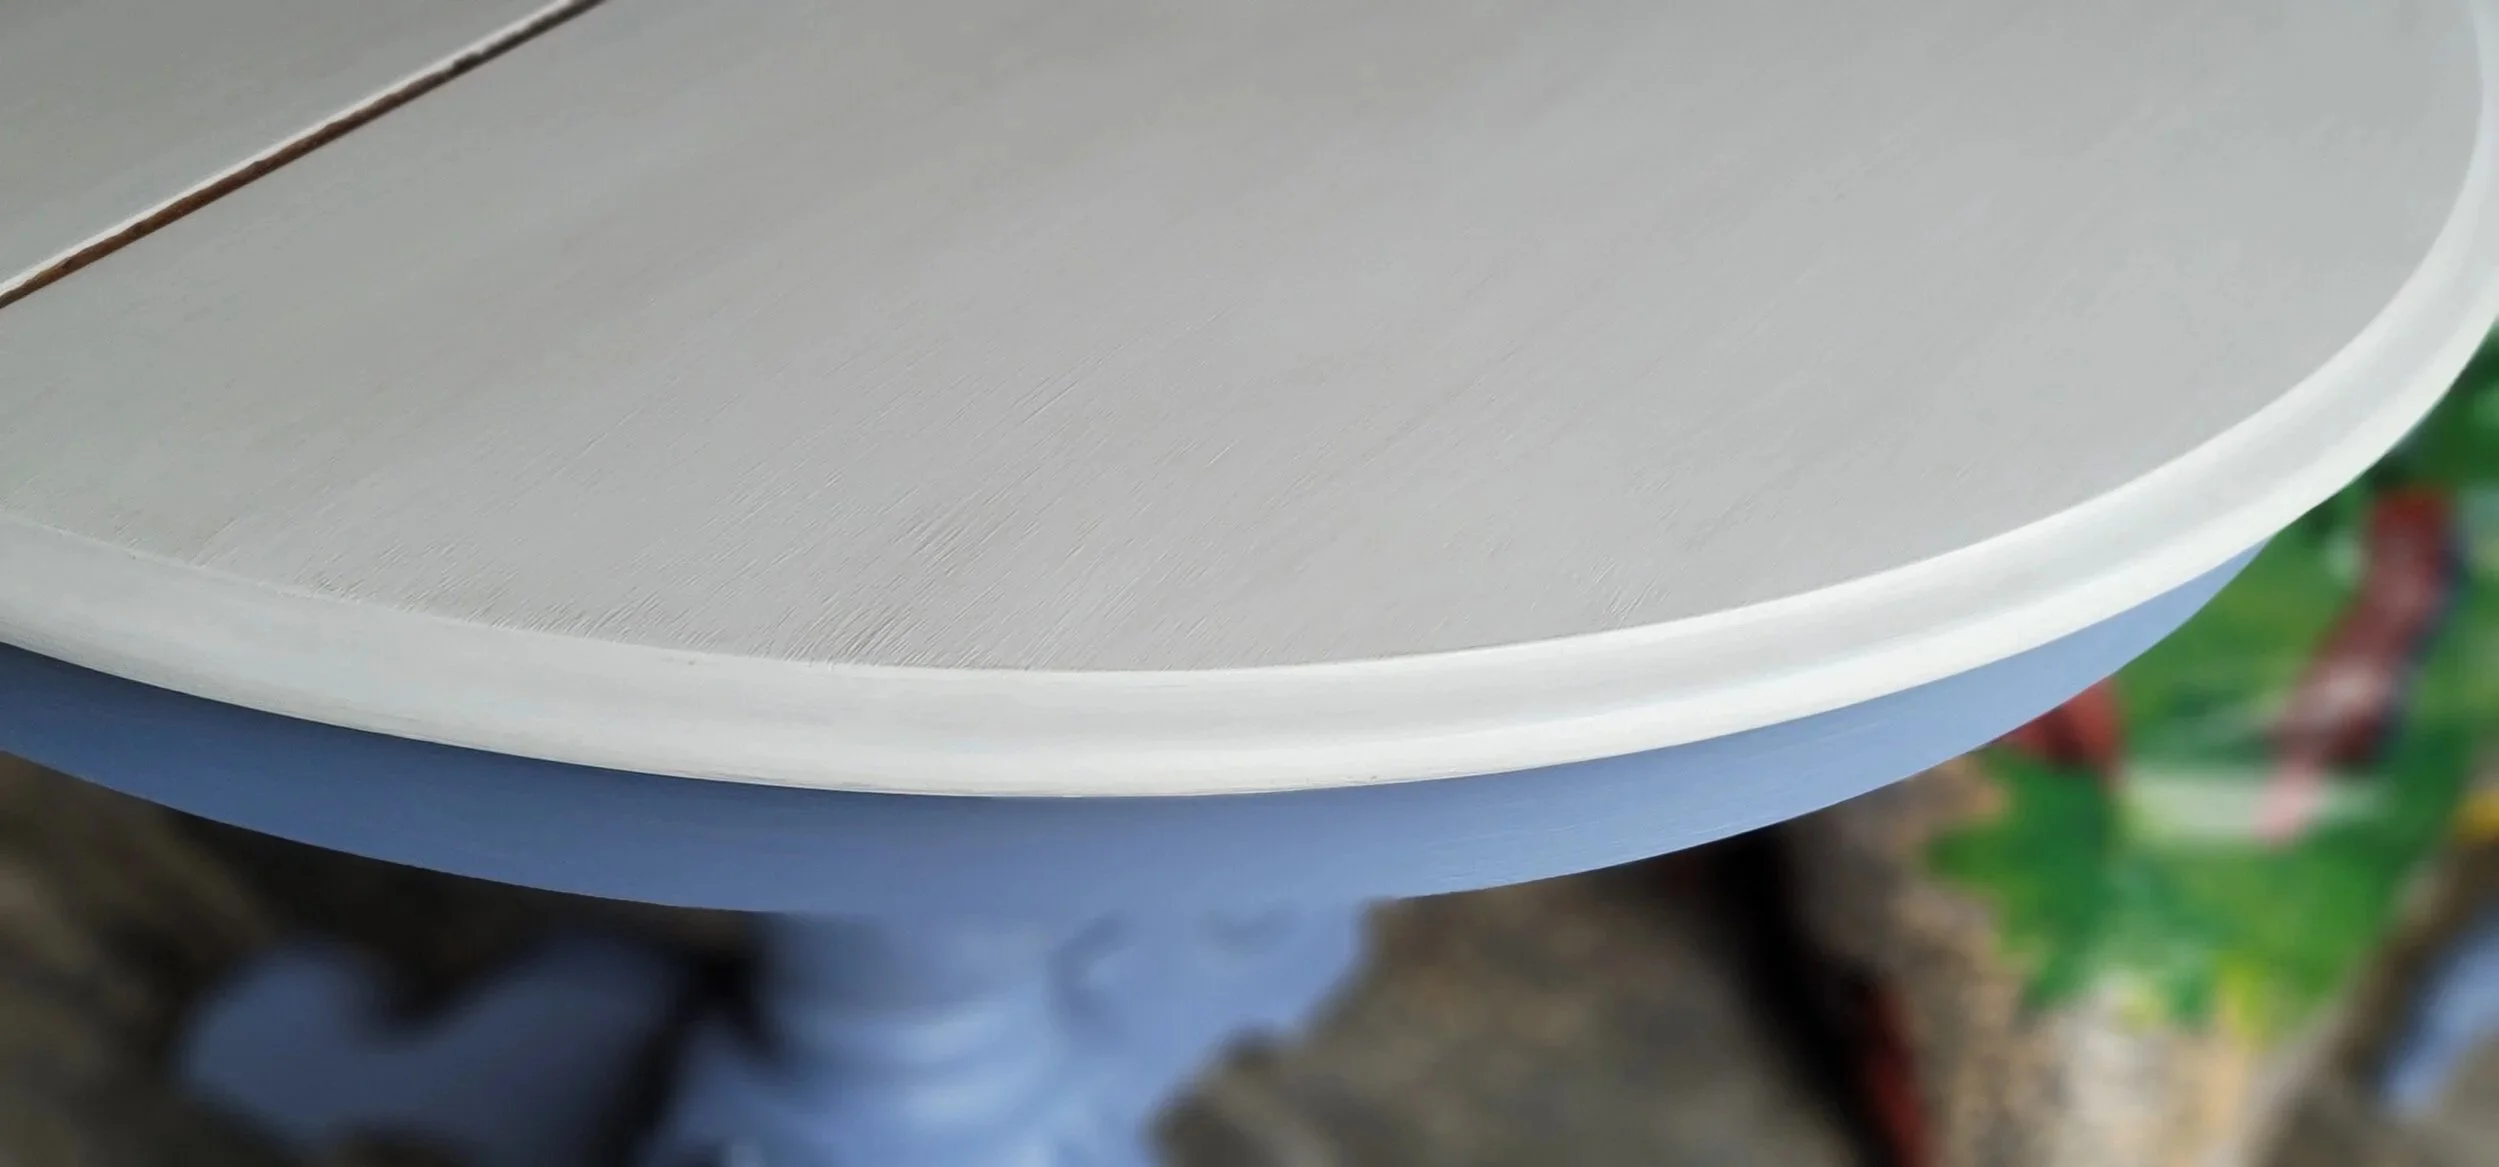

I mixed black and white wax so I could show detail on the white tops and seats.
The finished table was hardly used for several months before it was sold.
For this project I used the same blue paint that the room was painted. Since I used white wax on all the blue parts it doesn’t look the exact same color but compliments it nicely. I was really happy with the dimension that the gray wax added to the white top and chair seats. Using colored wax on large areas has a learning curve. All in all, this was a great experience.